
Changing the boot order, booting from USB or fixing possible boot issues. There could be a number of reasons why you would want to access the UEFI settings.
In this tutorial, I’ll show you three ways to access the UEFI settings in Windows 10:
- Using the designated key at boot time
- Using the UEFI settings from within Windows 10 (requires reboot as well)
Before you see the steps, please verify if your system is using UEFI or BIOS.
Method 1: Use F2/F10 or F12 keys at boot time to access UEFi settings
This is the classic method of accessing UEFI or the BIOS system.
Turn on your system. At the screen that shows the logo of your system manufacturer, press the F2 or F10 or F12 key. You may try pressing all of them one by one if you are not sure. But be quick when you do that otherwise it will boot into the operating system.
This key is different for different brand of computers. Some may even use Esc or Del keys for this purpose.

If it works, you should see the familiar BIOS screen. UEFI is underlying mechanism and it adds a few options in the boot settings. But the boot settings interface looks the same as the legacy BIOS system in many computers.
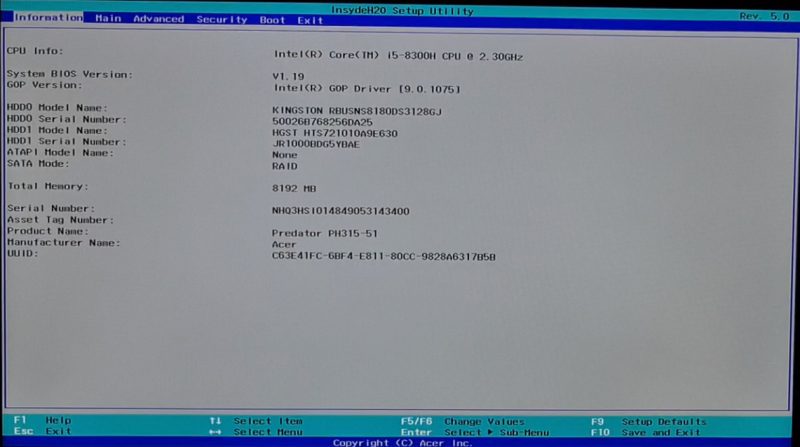
I have seen some newer computers have a totally different boot settings interface. This could differ from system to system.
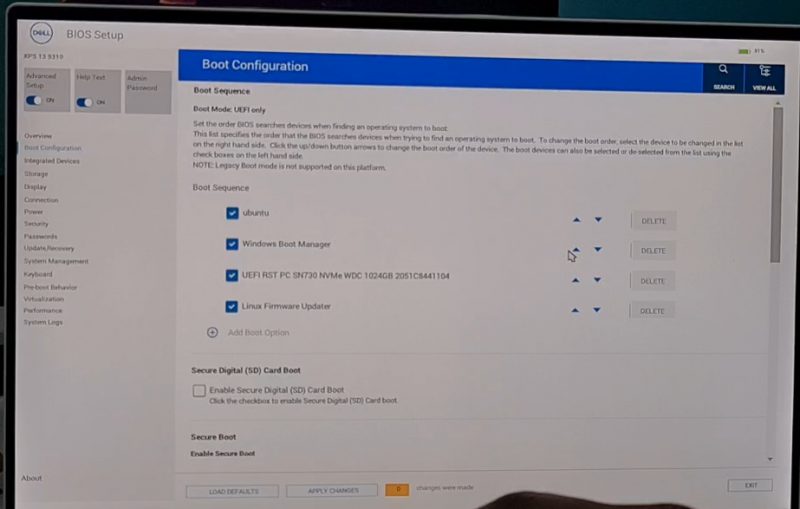
This should work on your system but if it keeps on booting to Windows, no need to be disappointed. You may access the UEFI settings from within Windows as well. The next method shows the steps.
Method 2: Access UEFI firmware settings from within Windows 10
Windows 10 provides a way to access the UEFI settings from within Windows itself. Please bear in mind that while you may opt to access UEFI this way, your system will be restarted and boots into the BIOS/UEFI.
Follow the steps below for accessing UEFI settings in Windows 10.
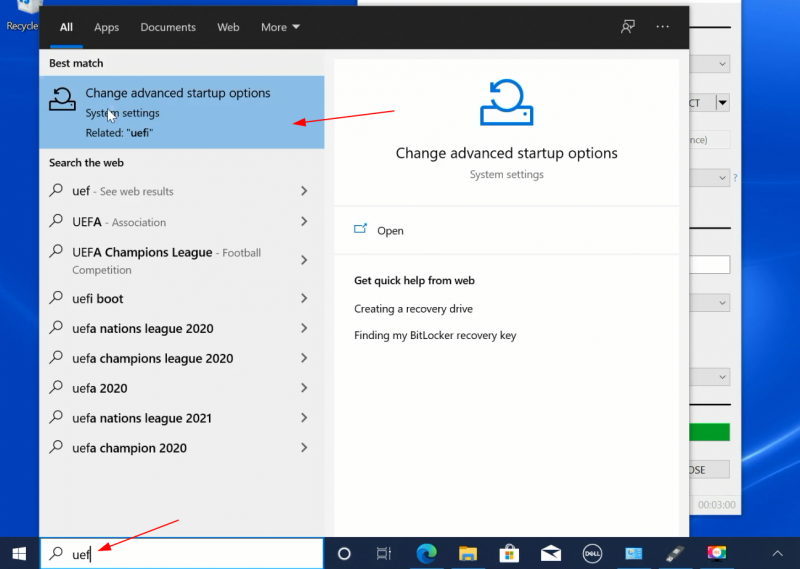
Step 1: Login to Windows and click on Menu. Search for UEFI and go to Change advanced startup options:
Step 2: In here, click on the Restart now button under Advanced startup option.
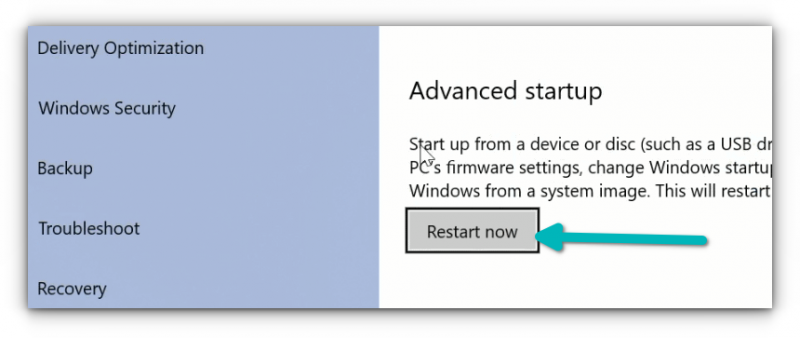
It will not restart your system immediately. Instead, you should see a blue screen with ‘Please wait’ displayed.

After a few seconds, you should see a blue screen with a few options to choose from. At this screen, you can choose to:
- Exit and continue using Windows 10 without restarting your system
- Turn off your system
- Boot into a USB device
- Access the Troubleshoot option for more advanced settings
You have to click on Troubleshoot option.
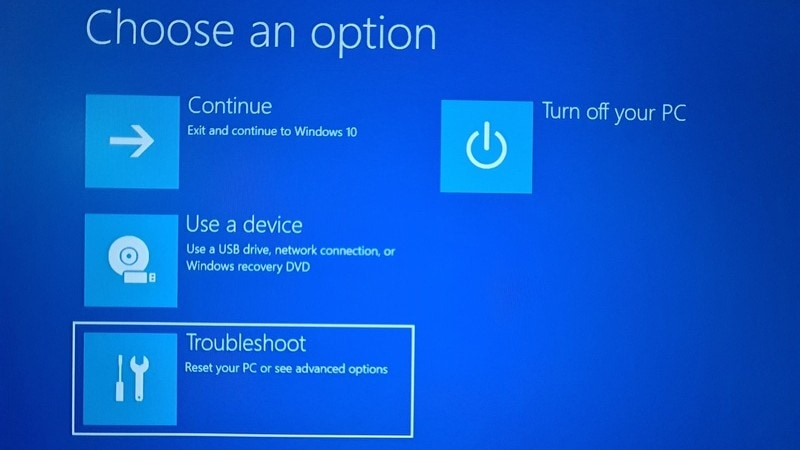
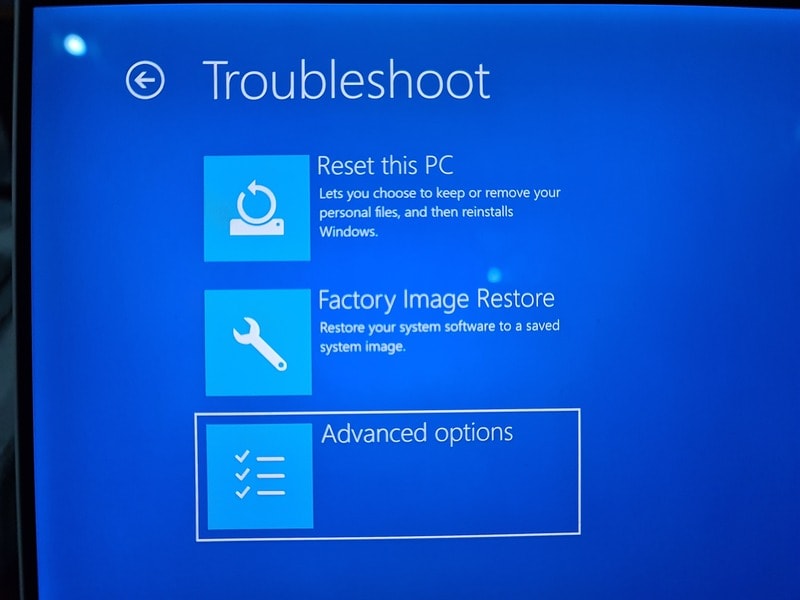
Now, some systems will give you the UEFI Firmware Settings on this screen. Some system may require you to choose an Advanced options.
If you see the UEFI Firmware Settings option, well, click on it. Otherwise, click the Advanced options.
When you see the UEFI Firmware Settings, click on it.
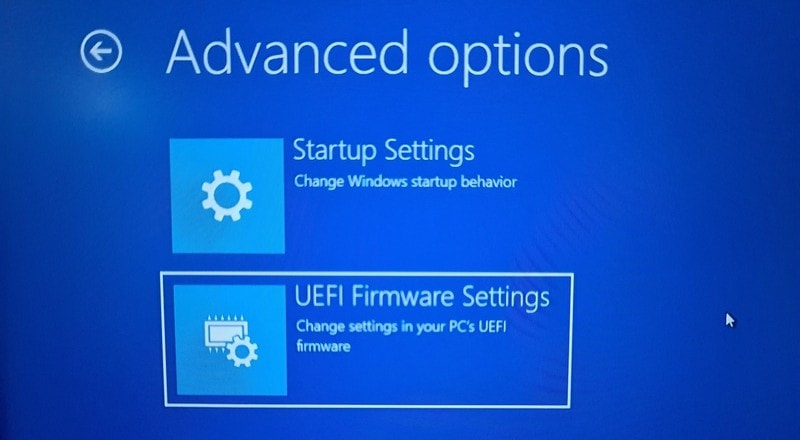
It will notify that you’ll have to restart in order to change any UEFI firmware settings (or UEFI settings in short). Click on the Restart button.

Your system will restart now and when it boots again, you’ll find yourself in the BIOS/UEFI settings interface.

That’s it. This is what you need to do to access UEFI firmware settings in Windows 10. Whenever I dual boot Linux and Windows, I use this method for using the live USB of Linux.
There is also a tutorial for accessing UEFI settings from Linux.

I hope you find this tutorial helpful. Any questions or suggestions? Please feel free to leave a comment below.


