
Manjaro Linux has come a long way since its inception. It is one of the most popular Linux distributions around, and one of the more highly regarded ones. It’s even considered one of the best Linux distro for beginners.
As the first step to try Manjaro Linux, I had to create a live USB. A live USB basically allows you to use Linux straight from the USB without the need of installing the OS on the system. This is a convenient way of testing out a Linux distribution before installing it. If you liked the Linux distribution, you can use the same live USB to install the Linux distribution.
And in this tutorial I’ll show you how to create a live USB of Manjaro Linux in Windows as well as in Linux.
Create live USB of Manjaro Linux in Windows
Creating a live USB or disk is really easy. Follow the steps below:
Step 1: Download Manjaro Linux ISO
Download the ISO image of Manjaro from the download page. There are three main versions available based on the desktop environments. Choose whichever you prefer. I chose GNOME.
Step 2: Download ISO burning tool
Now we need a tool to write this ISO image to a USB/disk. There are plenty of such applications available for free. Manjaro recommends Rufus.
Win32DiskImager is also an option — but it is no longer actively maintained. So, I’d recommend using Rufus. It’s easy to use and also offers advanced options. Hence, we’ll go with that.
Step 3: Prepare the USB
Once you have downloaded and installed Rufus, insert the USB or disk and launch Rufus.
It should automatically detect the USB drive you’ve plugged in. But, make sure it’s the correct drive before destroying the data on the selected device.
Once you’re confident about the device selected as shown in the image below, you can click on “SELECT” and then grab the ISO file from your computer.
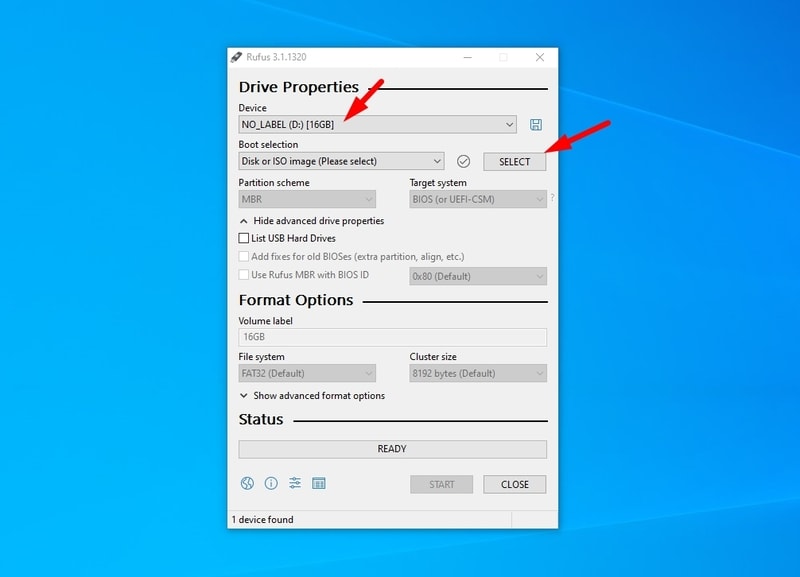
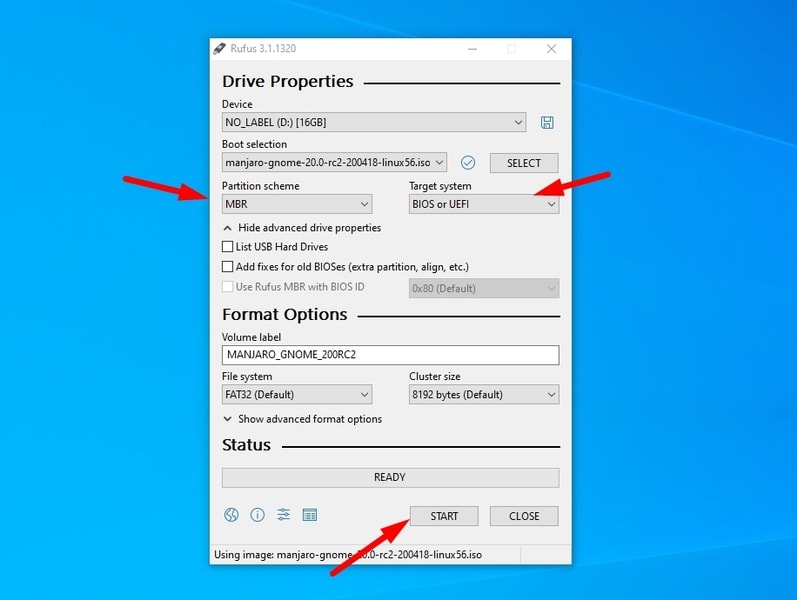
It will automatically choose the default partition scheme and target system (BIOS and UEFI). You can tweak it if you want to change them. It shouldn’t be an issue if you don’t change the settings — but I’ll recommend you to explore more about the disk partition scheme and your target system in case you have no idea about it.
Once you’re sure about the settings, just hit “START” to get started.
Step 4: Write the ISO image to the USB
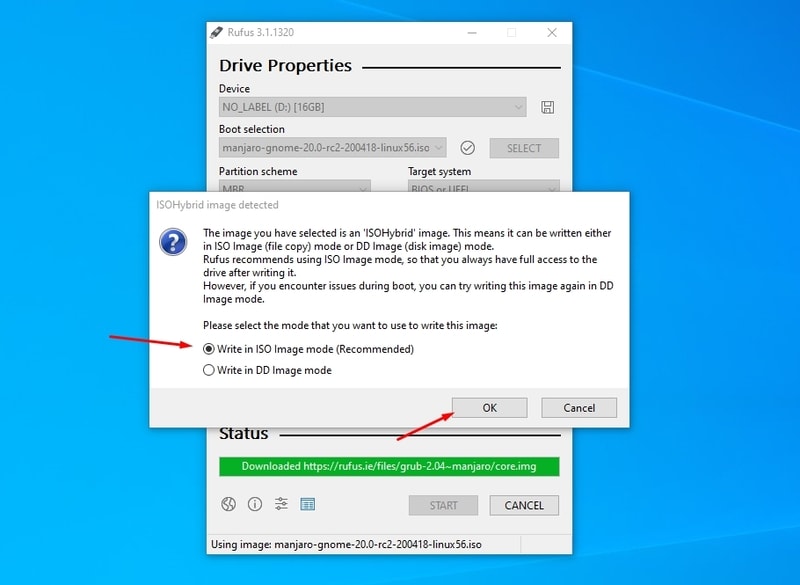
Next, you might see a pop up asking you to choose the correct mode. Here, select the ISO Image mode as shown in the screenshot below:
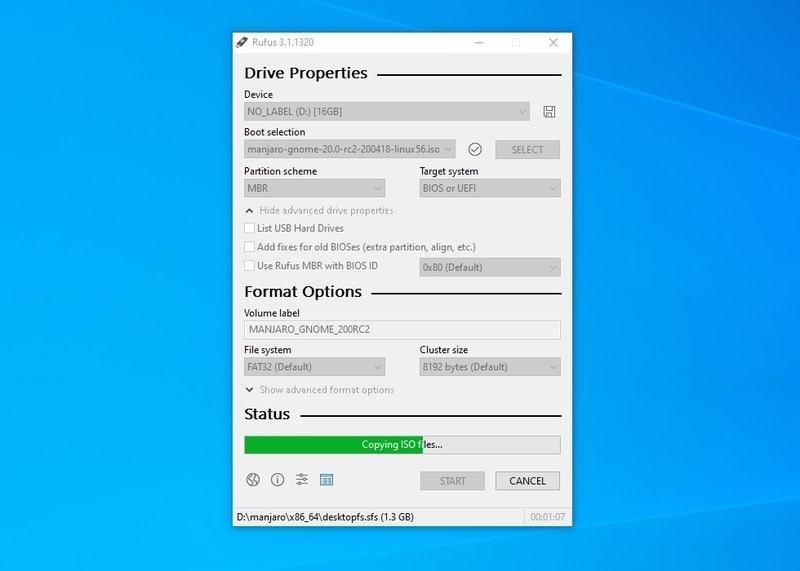
You’ll see a progress bar to keep track of what’s happening.
After it’s done, you’ll get a popup saying that the USB drive is ready.
That’s it, your drive is ready to be booted from. Now restart the computer, press F10/F12 and boot from the USB drive/removable disk.
Creating live USB of Manjaro in Linux
If you are already using a Linux distribution like Ubuntu or Linux Mint and you want to try Manjaro, you can create bootable USB of Manjaro in Linux as well.
Download Manjaro Linux ISO first and then follow these steps:
Step 1:
I recommend you use Etcher to create live USBs. To install Etcher, go to Etcher’s website and download the Linux Package.
After downloading the package, extract it to get an .AppImage file. Before you use the AppImage file, change the permissions to make it executable.
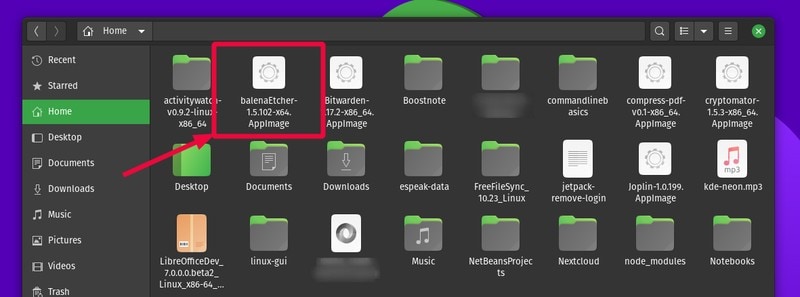
Double click the file to launch Etcher.
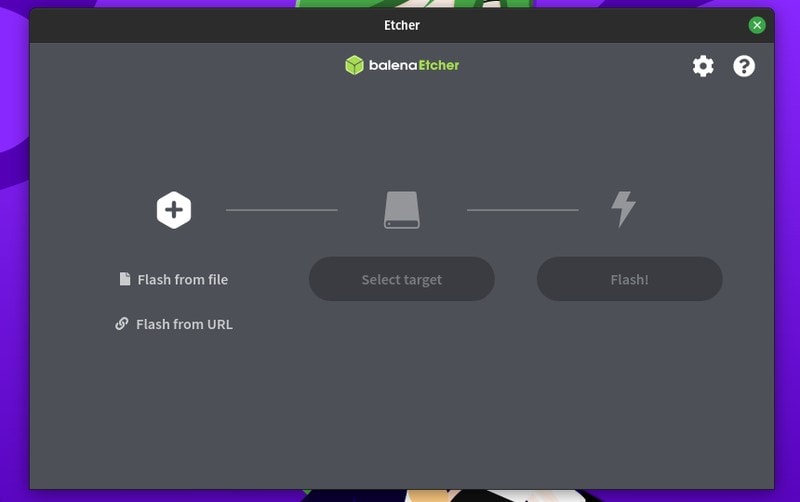
Step 2:
Click on ‘Flash from file. You will get a prompt to select the downloaded ISO file. You can also opt to flash from URL — which will basically download the file for you and select it.

Step 3:
Now, click on ‘Select target’ in the second column to select your USB drive. After selecting your drive, click continue.
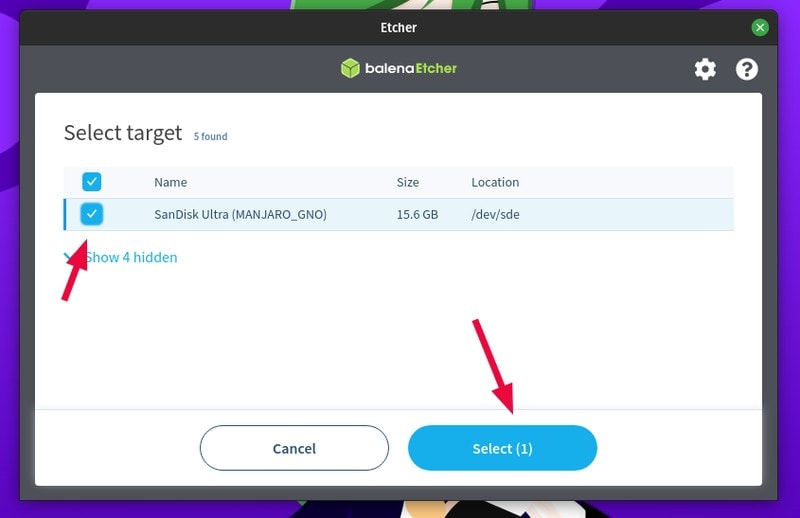
Step 4:
Now click ‘Flash‘ to begin writing the ISO contents to the USB drive. You will get a password prompt so that Etcher can access the drive. Enter your password to continue.
You can see the progress and remaining time of the process as its going on.
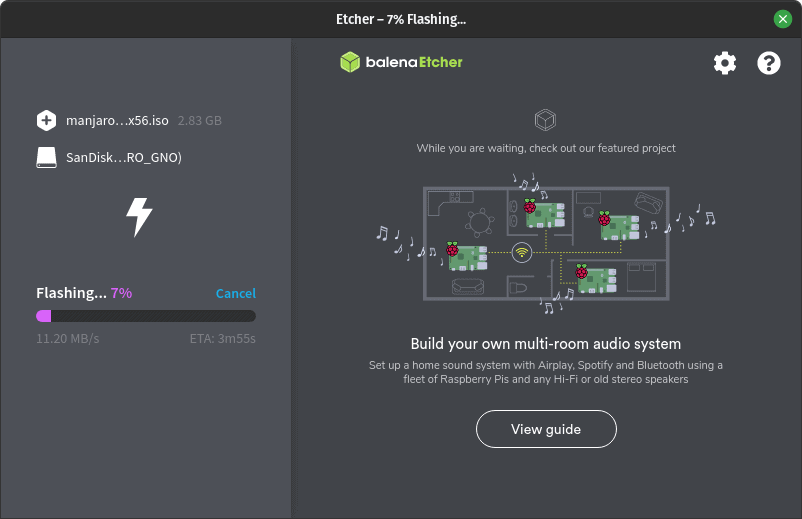
Once the process is complete, it will verify/validate the USB drive and you will be greeted with a screen telling you that it is done.
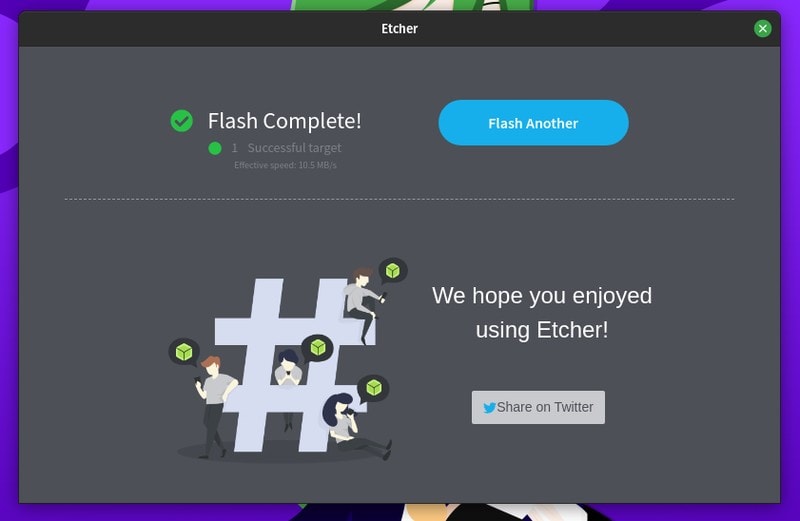
Now, your USB drive is ready to be booted into Manjaro Linux. You can reboot your computer and press F10/F12 (the specific key combo for your device) to boot using the USB drive.
What's next?
Your next step might be the installation of Manjaro Linux.
And if you are trying this distro, we have a good place to help you get started with it.

I hope you found the tutorial to create live USB of Manjaro Linux in Windows and Linux helpful. Let me know in the comments if you need any help.


