
When you are working on a badge, poster or any other composition in GIMP and you need to bend or curve some text. The versatile GIMP tool offers several ways to create curved text. Depending on how you will use it and the curvature you want to give to your text, some methods are better than others.
In this GIMP tutorial, I’ll show you my preferred way of creating curve texts.
How to create curve text in GIMP
Please make sure that you have GIMP installed on your system already.
Step 1: Create a path that matches the type of curve you want
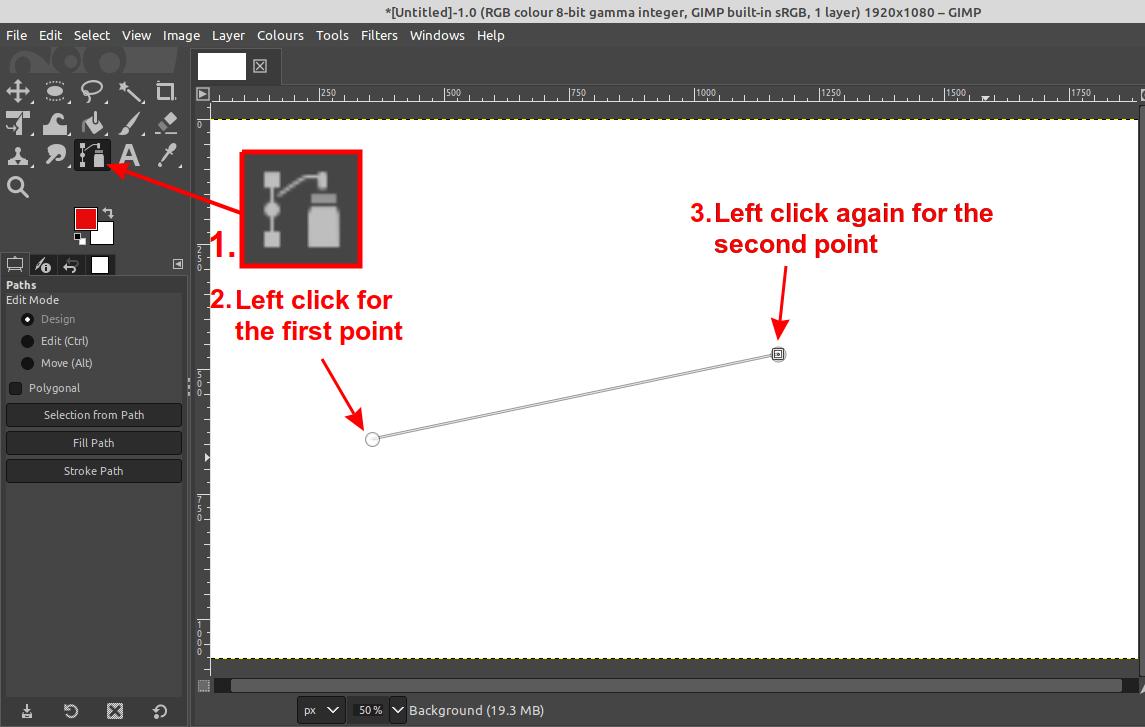
Create a new image or open an existing one. Select the paths tool and then having in mind roughly the position of the curved text, create your path by clicking once for the start and then for the end of path point.
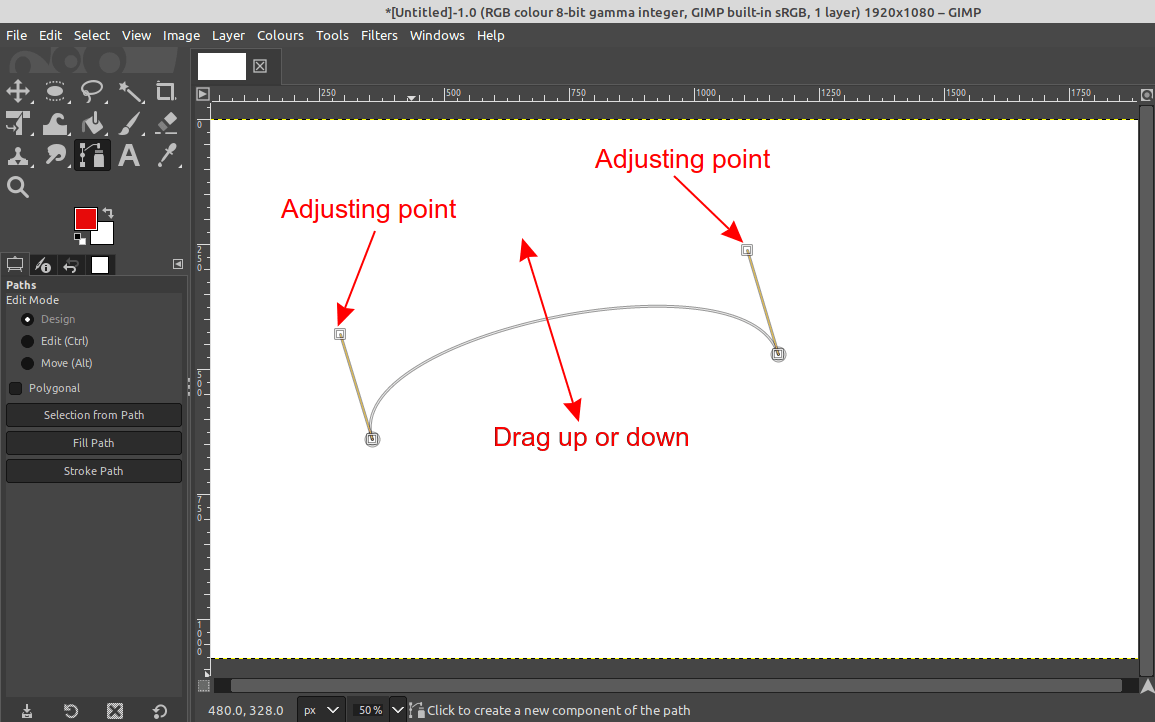
Then give to your path a curvature. First drag the line in the middle either up or down, and fine tune by moving the adjusting points. This will give it an arch.
Step 2: Create the text you want to curve
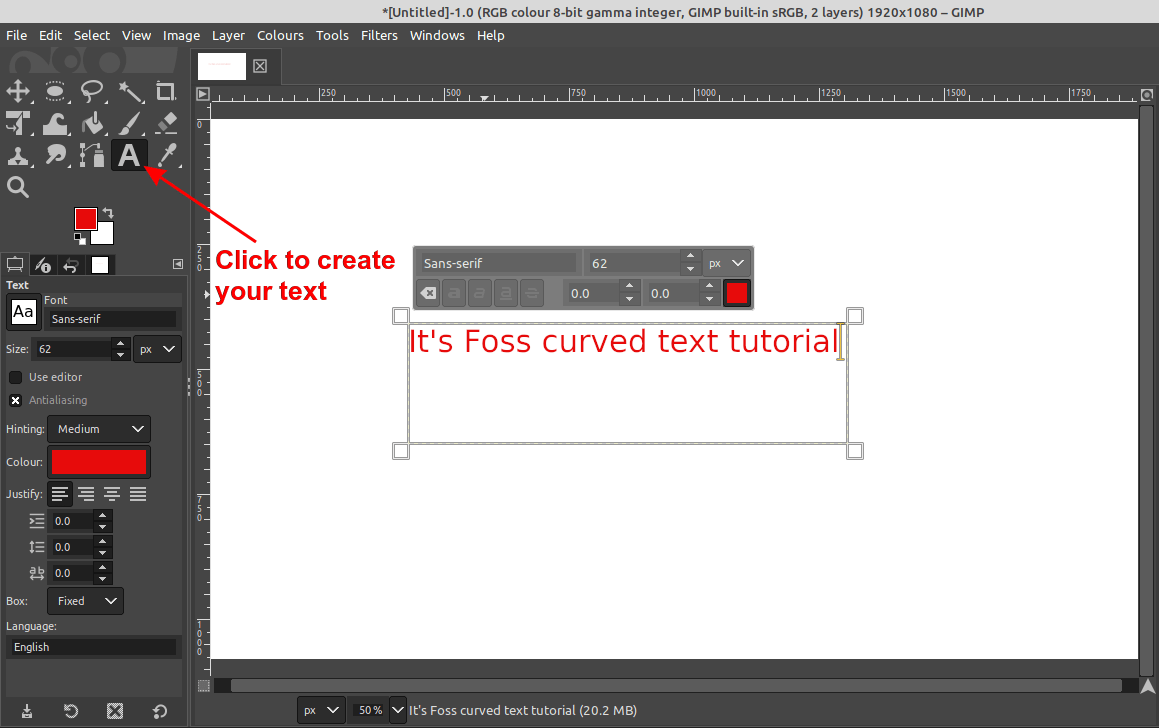
When you are satisfied with your curved path, you can move to the next step and create your text.
You may want to change the font and the font size. My selections are for demonstration purpose only.
Step 3: Create a new layer
I strongly suggest separating each different element of a GIMP image in different layers, in order to manipulate them easily like move, turn on/off an element etc.
Following this rule our curved text will be placed at a new layer. It is recommended to name your new layer like “Curved Text” or something similar to easily identify it.
Step 4: Curve the text
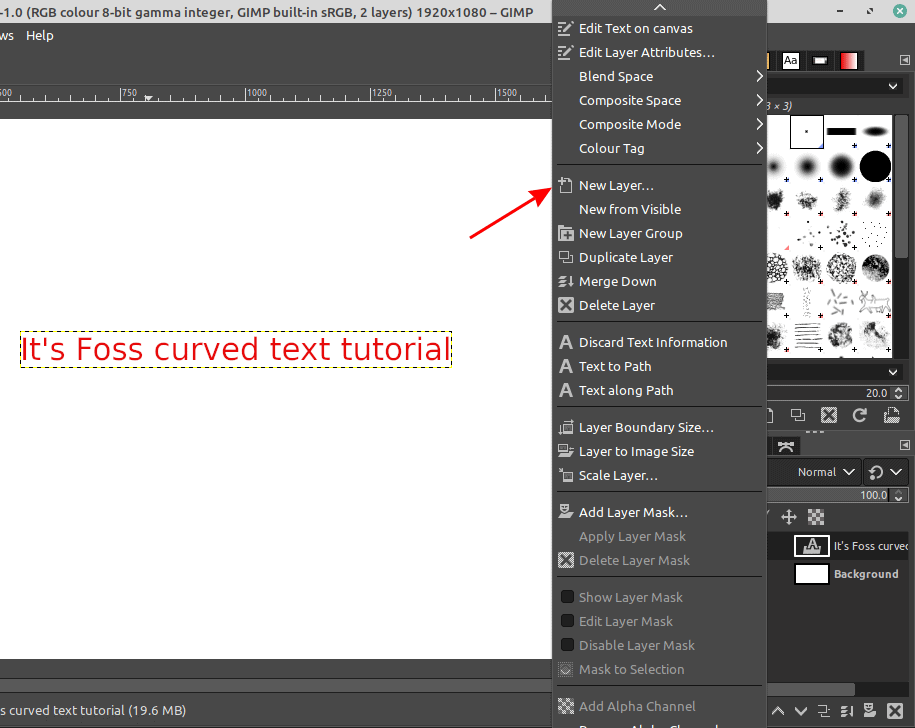
Now you need to click on the layer that your text is and right click on it and then click on “Text along path” to bend your text. The curved text will be placed at the newly created layer.
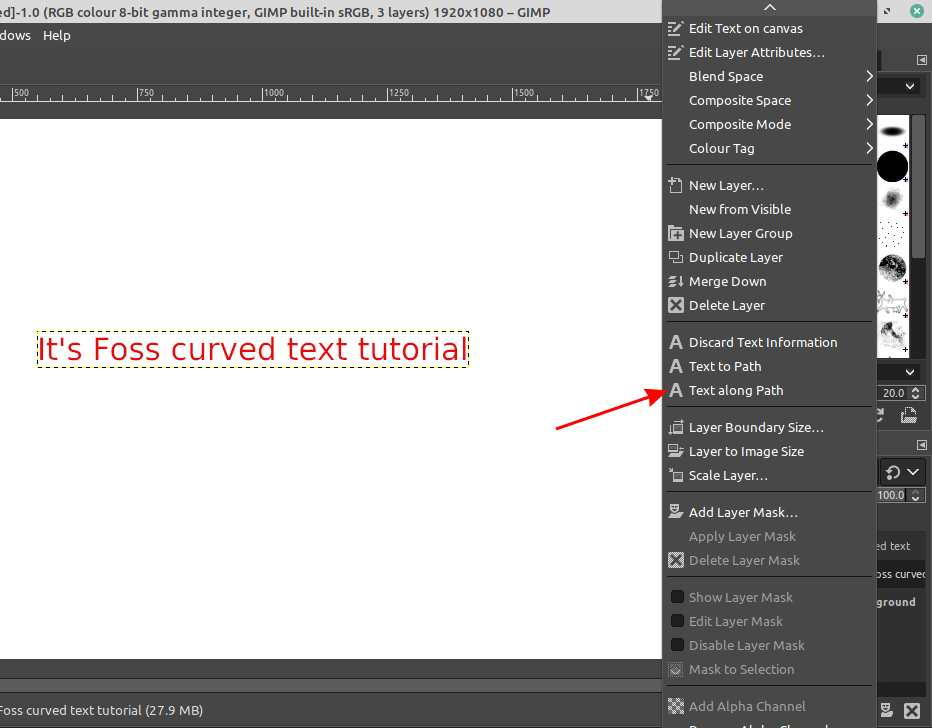
You just curved the text! Let’s make the text more presentable by filling it with colour.
Step 5: Final touches and export
Click on the curved text layer and then go to the path tab to select the text boundaries.
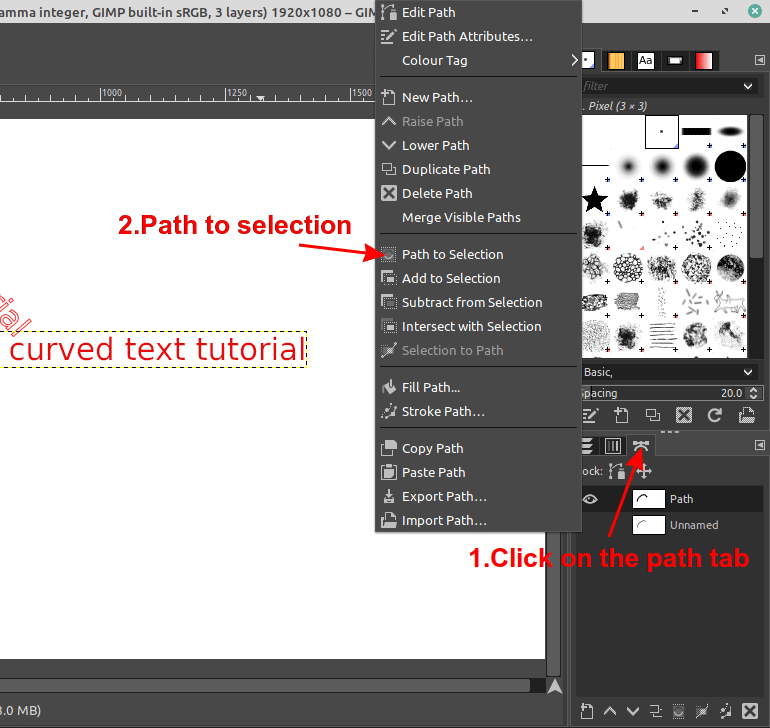
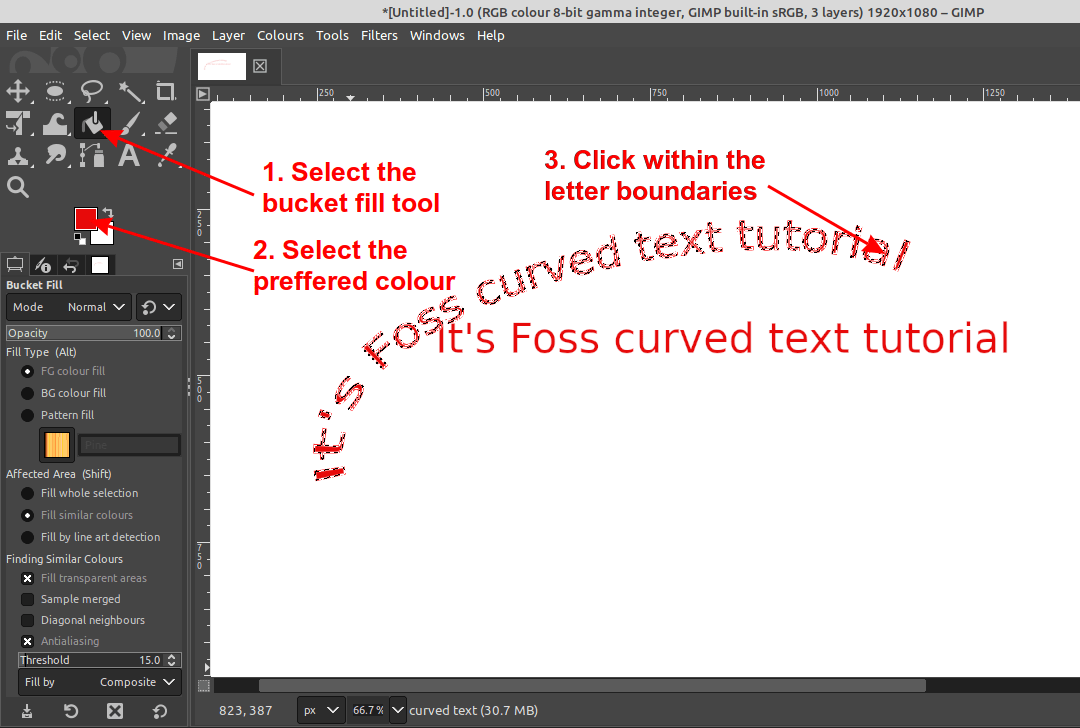
Finally, select the bucket tool, a color of your choice and apply your selection as per below.
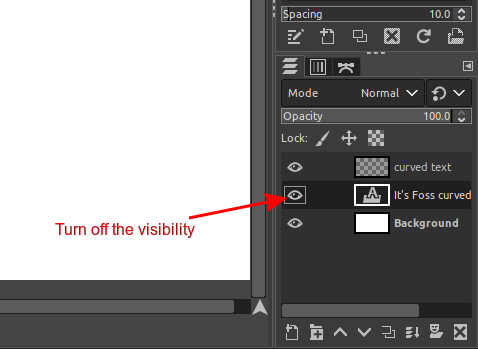
As the last step, turn the visibility of the layers that you don’t want and keep only the curved text. Then you are ready to export your file as your preferred image format.
Bonus Tip: Create shade effect
I have an additional step as an exercise/challenge if you want to go the extra mile. Let’s create a shade effect to the curved text by outlining the text in GIMP.
I will give you some hints:
- Turn all the layers back on
- Click on the curved text layer and the use the move tool to move the text away
- Create another layer and repeat the bucket fill procedure with a black colour
- Overlay the layers in a way that they mimic a shaded position (you may need to change the layers order)
- Turn off the auxiliary layers
The final result!
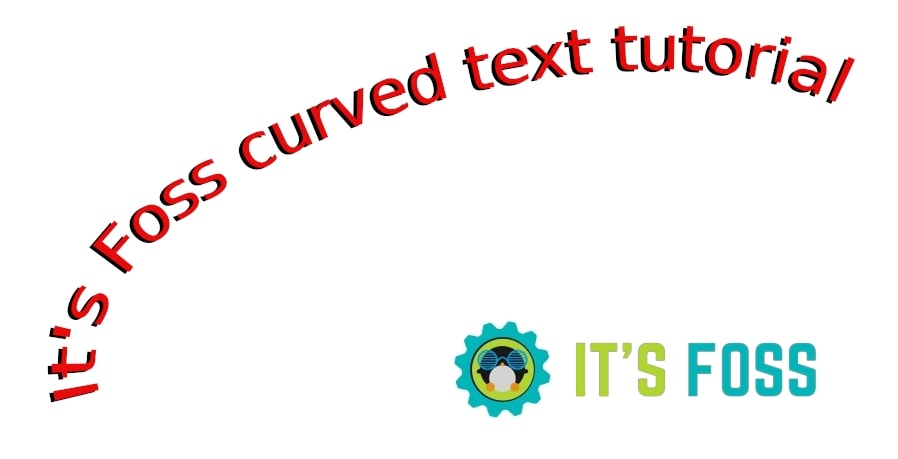
Let me know in the comments below your thoughts about this GIMP tutorial and how many of you tried the bonus step.
Don’t forget to subscribe to the newsletter as It’s FOSS team has much more for you in the near future!

