
In a recent article, you saw the best ways to download YouTube videos in Ubuntu. In a similar post, you’ll see how to extract audio from a video file in Ubuntu and other Linux distributions.
There are several tools you can use to for this. Converting video to MP3 or other audio format is a simple task in Linux.
I’ll show you three methods in this tutorial:
- Extract audio from video using VLC media player [GUI method]
- Extract audio using “4K Video to MP3” tool [non-FOSS GUI tool]
- Extract audio using ffmpeg [command line tool]
Method 1: Extract audio from video using VLC Media Player
If you use Linux as a daily driver, you’re quite likely to have VLC Media Player installed.
VLC can do a lot of things other than playing videos. You can download subtitles, synchronize subtitles and what not. One of the cool VLC tips is to convert videos to audio.
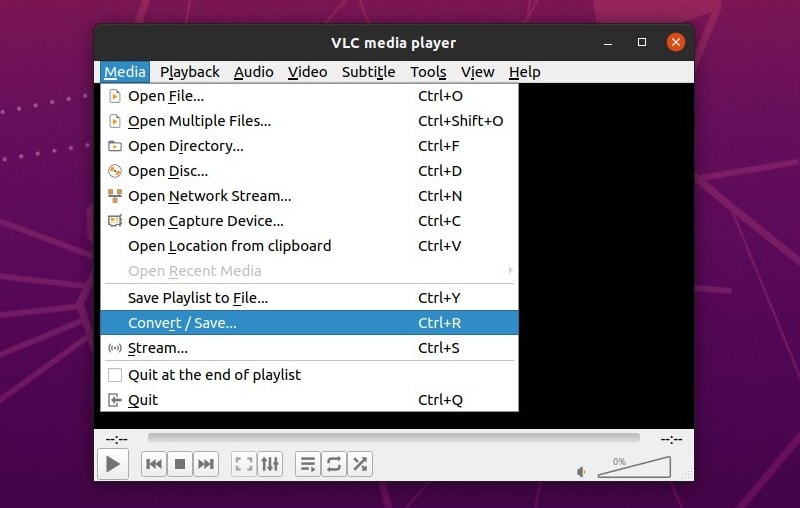
Click on Convert/Save in the Media drop down menu or use the ctrl + R shortcut.
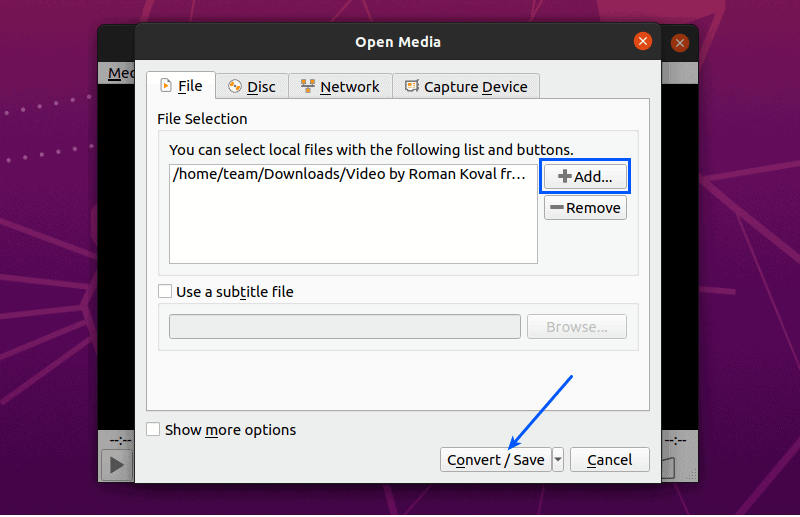
Click on the Add button and select the desired video file, then choose the Convert/Save button to proceed to the next step.
Here, choose the desired audio format by selecting the appropriate Profile option.
Set the destination for the extracted audio to be saved and as the default format for saving converted videos is .mp4, make sure the file extension matches the selected profile.
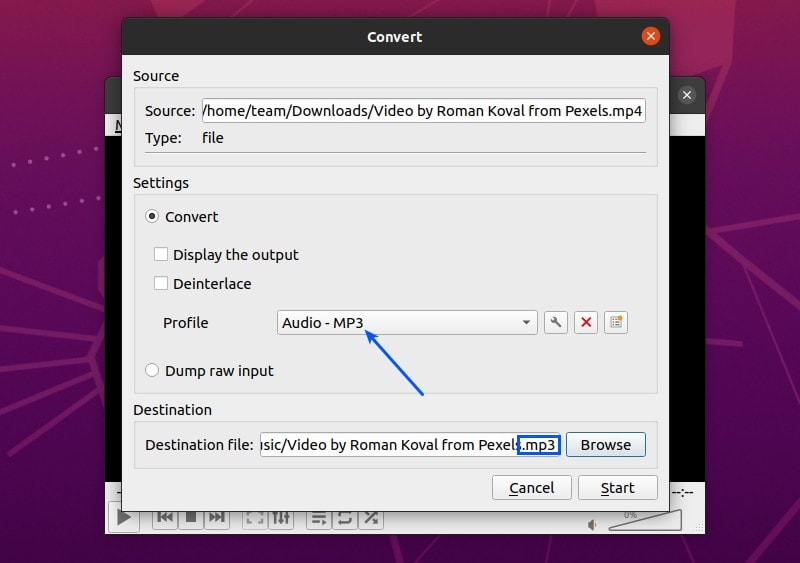
Click Start to start the extraction.
Method 2: Using “4K Video to MP3” tool [Not open source]
Since the source code for this tool is not available and it is only available as a .deb file, it can only be installed on Debian/Ubuntu or Linux distributions based off them like Elementary OS, Zorin OS, KDE Neon, Linux Mint and MX Linux.
4K Video to MP3 is only available for 64 bit systems, so if you’re not sure, you should check whether your system is 32 bit or 64 bit.
Once downloaded, double click on it to install. For faster installation, I would recommend to use gdebi as your default installer instead of Ubuntu Software Center.
Once, 4K Video to MP3 is successfully installed, launch 4K Video to MP3 from the application menu.
When you select the Add Video option, the audio is extracted and the audio file is saved in a preconfigured location (~/Music/4K\ Video\ to\ MP3/). If you want to save it in a custom location, first click the Preferences option.
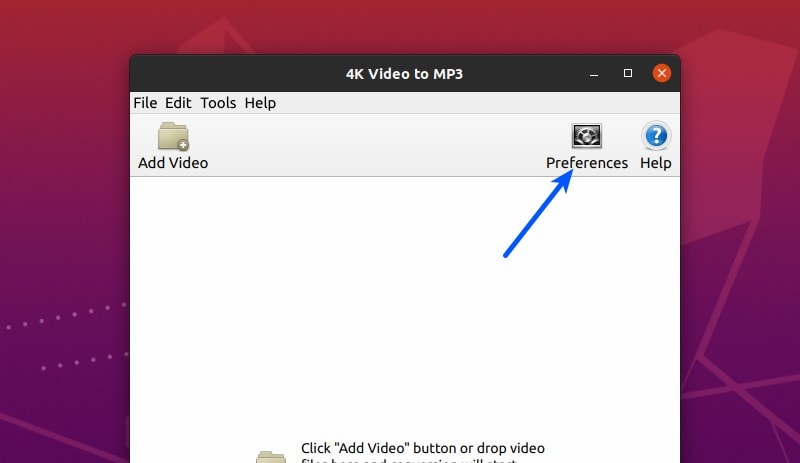
In Preferences, you can choose the desired audio format, quality and destination folder.
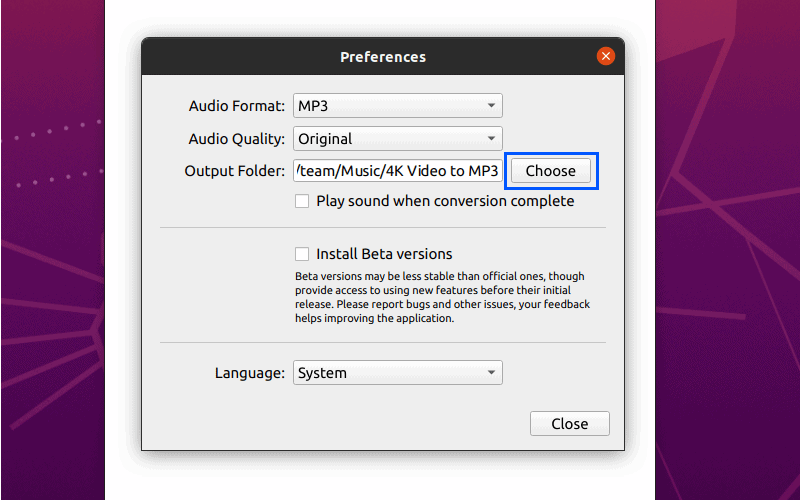
Once you’ve set the required settings, click on the Add Video button, choose the source video and wait for the conversion to complete.
Method 3: Extract audio from video using ffmpeg command line tool
Almost anything can be done on the terminal and most of the time, it requires just one command. In this case, ffmpeg can be used, which is a command line tool which can extract audio fromo the desired video with just one command.
To install ffmpeg on Ubuntu and Debian based distributions, run:
sudo apt install ffmpegTo extract audio from an input video file using ffmpeg, use:
ffmpeg -i input-video-file output-audio-fileReplace <input-video> and <output-audio> with the corresponding paths along with appropriate file extensions.

There are a lot of other options to extract audio from a video file in Linux, including Sound Converter, which is fairly simple to use and is available for all Linux Distributions as its tarball can be downloaded.
If you want to experiment with audio-video further, I suggest reading on how to record streaming audio in Ubuntu.

I hope you find this tutorial helpful. Stay tuned for more such articles. If you have questions or suggestions, feel free to leave a comment.


