
Android Studio, Google’s own IDE for Android development, is a nice alternative to Eclipse with ADT plugin.
The additional advantage of Android Studio is that even if you are not developing apps, create an Android device emulator, which can run popular apps for you.
So, even if it is a workaround, you can run Android apps on Linux using Android Studio.
In Linux, there is no native package for Android studio that you can install using the package managers like APT.
To install, you either need to rely on the snap package or install it as mentioned in the official documentation. Both the method will be discussed here. Ubuntu users have a PPA to help them out.
You have to be careful about the minimum system requirements.
- Any 64-bit Linux distribution that supports GNOME, KDE, or Unity DE; GNU C Library (glibc) 2.31 or later.
- At least 8 GB RAM (16 GB is better) and 8 GB disk space (16 GB or more is better)
- x86_64 CPU architecture; 2nd generation Intel Core or newer, or AMD processor with support for AMD Virtualization (AMD-V) and SSSE3.
- Enable KVM in Ubuntu, for better performance.
- A screen resolution of 1920 x 1080 or more
Method 1: Install Android Studio in Ubuntu as a Snap (Easiest)
Ever since Ubuntu started focusing on Snap packages, more software have started providing easy to install Snap packages. Android Studio is one of them. Ubuntu users can find the Android Studio application in the Software Center and install it from there.
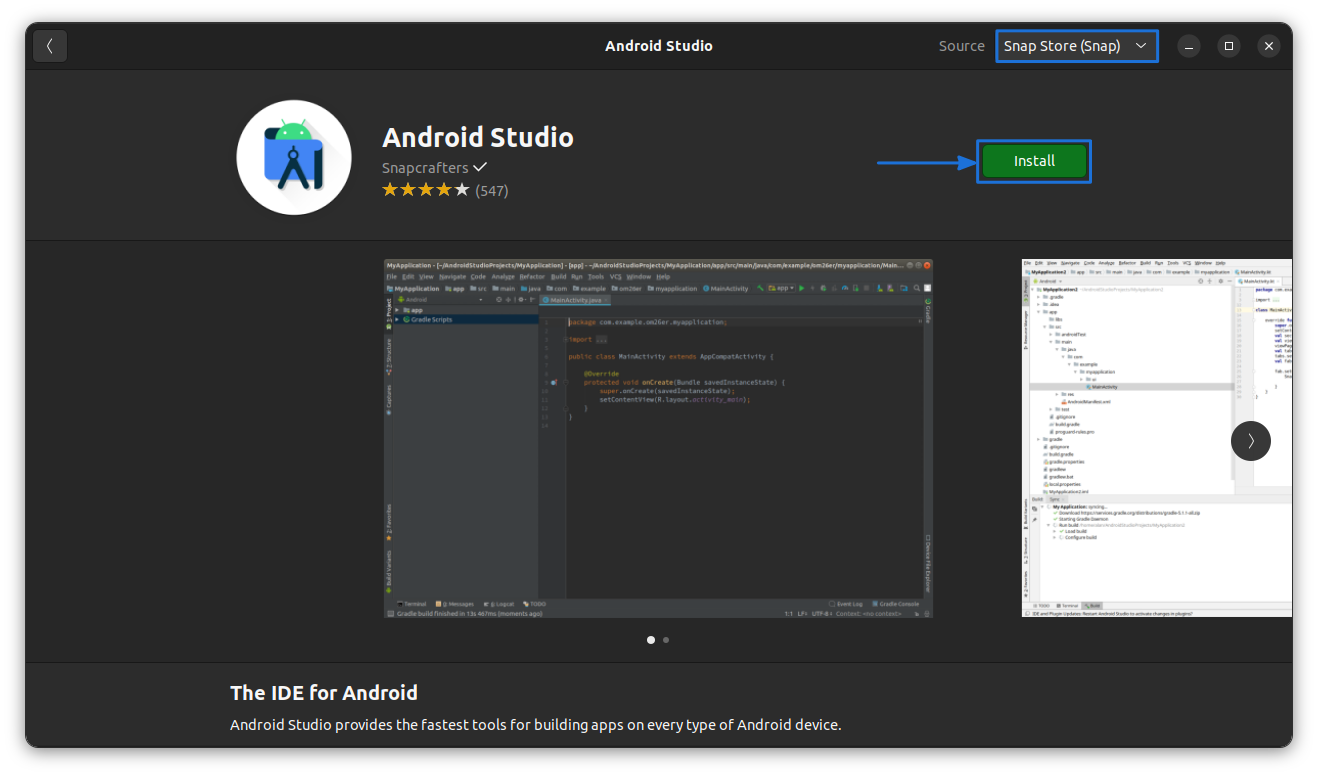
If you see an error while installing Android Studio from Software Center, you can use the Snap commands to install Android studio.
sudo snap install android-studio --classic
Remove Android Studio Snap
To remove Android Studio, installed as a snap, either use the “Remove” button on Software center or use the command below:
sudo snap remove android-studio
Easy-peasy!
Method 2: Install Android Studio in Ubuntu and Linux Mint via unofficial PPA
Thanks to Paolo Ratolo, and maarten-fonville we have a PPA which can be used to easily install Android Studio in Ubuntu, Linux Mint and other Ubuntu-based distributions. Just note that it will download around several hundred MBs of data. So, mind your internet connection as well as data charges (if any).
Open a terminal and use the following commands to install dependencies and libraries and Java.
sudo apt-get install libc6:i386 libncurses5:i386 libstdc++6:i386 lib32z1 libbz2-1.0:i386
sudo apt install openjdk-11-jdk
In the above step, we have installed Java required for the app to run. Now, add the PPA and install Android Studio.
sudo add-apt-repository ppa:maarten-fonville/android-studio
sudo apt update
sudo apt install android-studio
This will install Android Studio and you can open it from the system menu. Once opened, the remaining setup is described in the method 3.
Was it not easy? While installing a program from source code is fun in a way, it is always nice to have such PPAs. Once we have seen how to install Android Studio, let's see how to uninstall it.
Remove Android Studio
First remove the Android Studio installed using:
sudo apt purge android-studio
If you don’t have already, install PPA Purge:
sudo apt install ppa-purge
Now use the PPA Purge to purge the installed PPA:
Method 3: Install Android Studio in any Linux Distributions using the official method (Complicated)
Android Studio has a package that will help you easily install it on a Linux system. You should make sure that, the minimum requirements mentioned in the previous section are met.
Set up the required dependencies and prerequisites
To install from the official files, you need to install some prerequisite libraries and dependencies.
For Debian/Ubuntu-based systems, use the command below:
sudo apt-get install libc6:i386 libncurses5:i386 libstdc++6:i386 lib32z1 libbz2-1.0:i386If you are using Fedora, use the command as given below:
sudo yum install zlib.i686 ncurses-libs.i686 bzip2-libs.i686Download the Installer File
Android studio provides official files to install the software on Linux distributions. You need to go to the official downloads page and download the installer files.
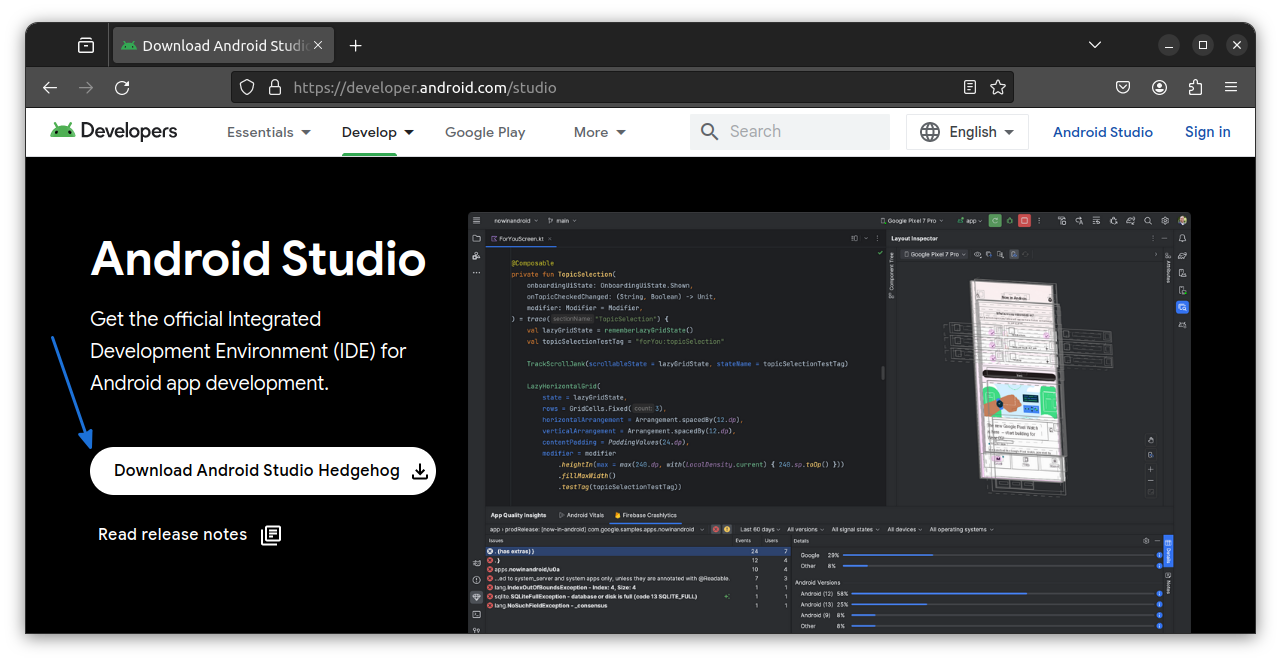
This will ask you to accept their Terms and Conditions. Scroll down the page and check the Accept button. Now, click on the Download button to start your download.
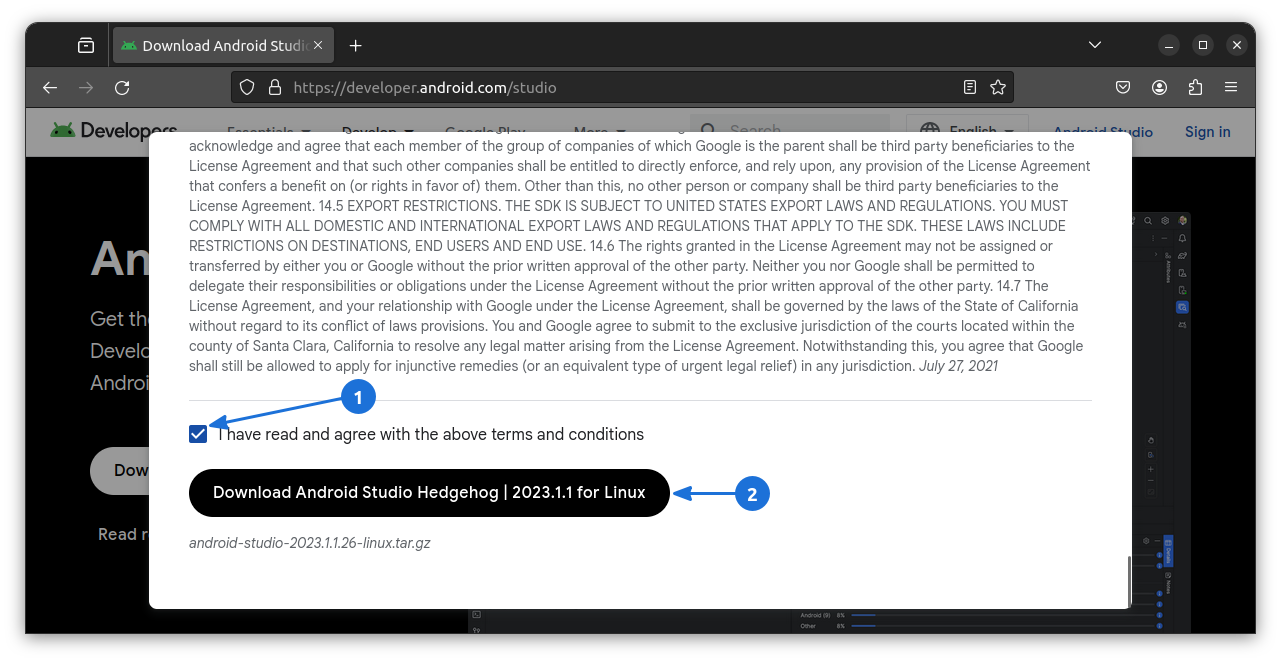
Ensure you have a fast internet connection because the files are around 1.1 GB in size.
Start the Installer
Once you have downloaded the file, extract the tar file. You can do this from the file manager, by right-click and selecting Extract.
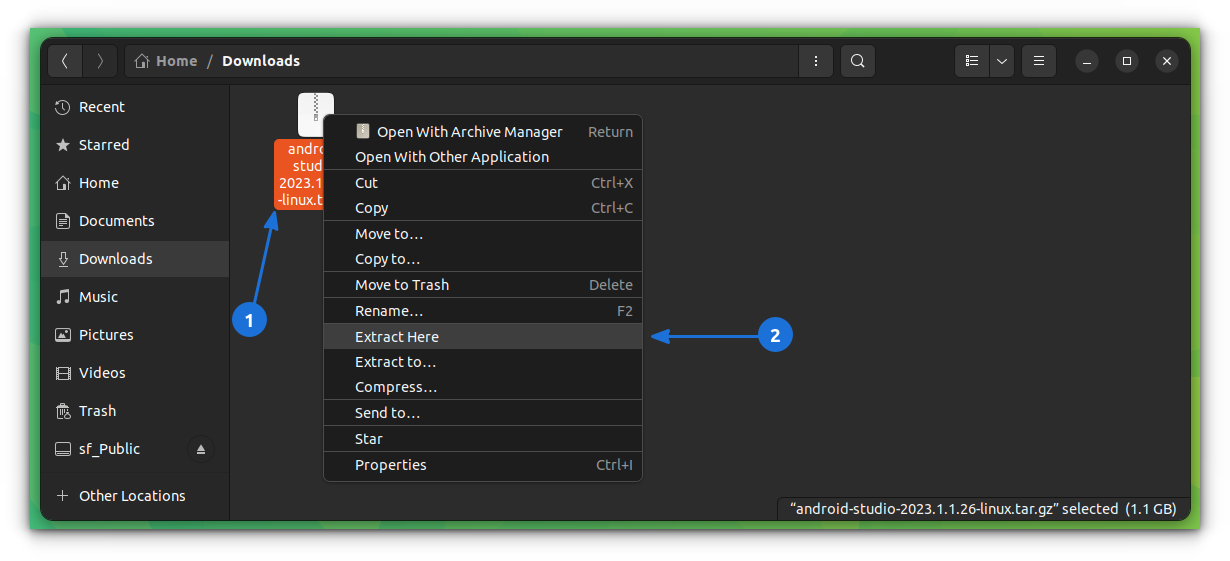
Once extracted, move inside the extracted folder. Now, right-click on an empty place and select “Open in Terminal” to open a terminal there.
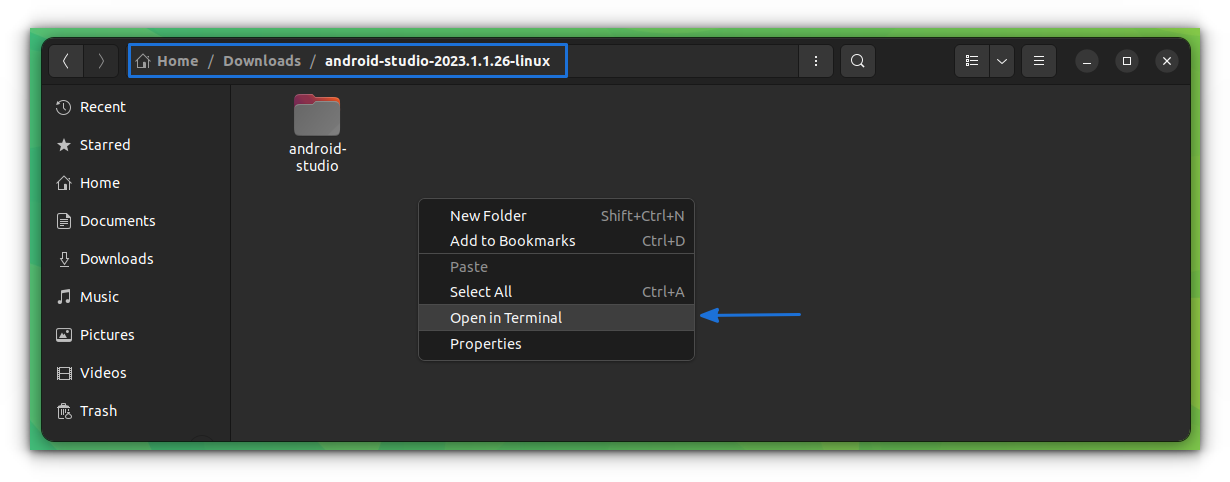
Now, move the android-studio directory to:
/opt/for shared users./usr/local/for your user.
Use the command like:
sudo mv android-studio /opt/
Start Android Studio by going inside the /android-studio/bin. Considering you have copied it to /opt/, run:
/opt/android-studio/bin/studio.sh
Or if you moved it to /usr/local/, then use the command:
/usr/local/android-studio/bin/studio.sh
This will open the setup. When first opened, select “Do not import Settings” and then press OK.
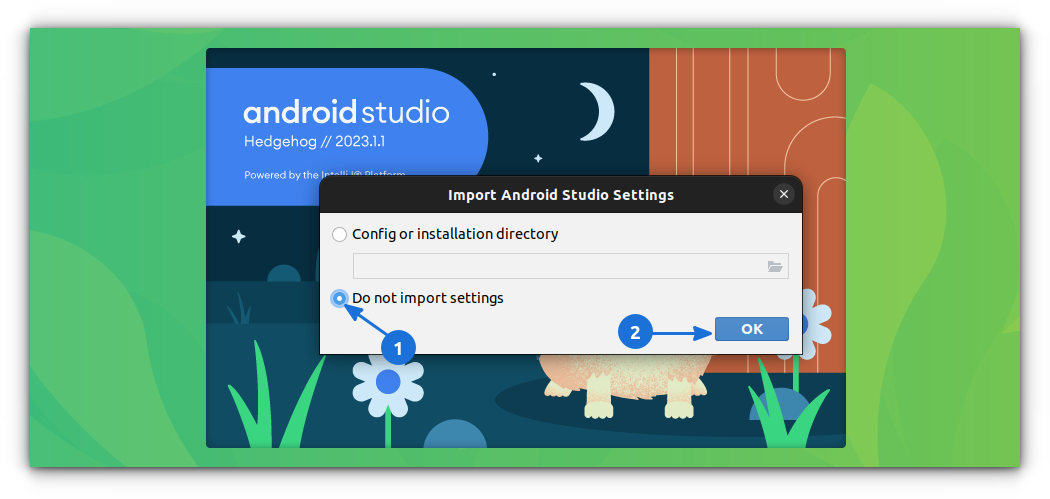
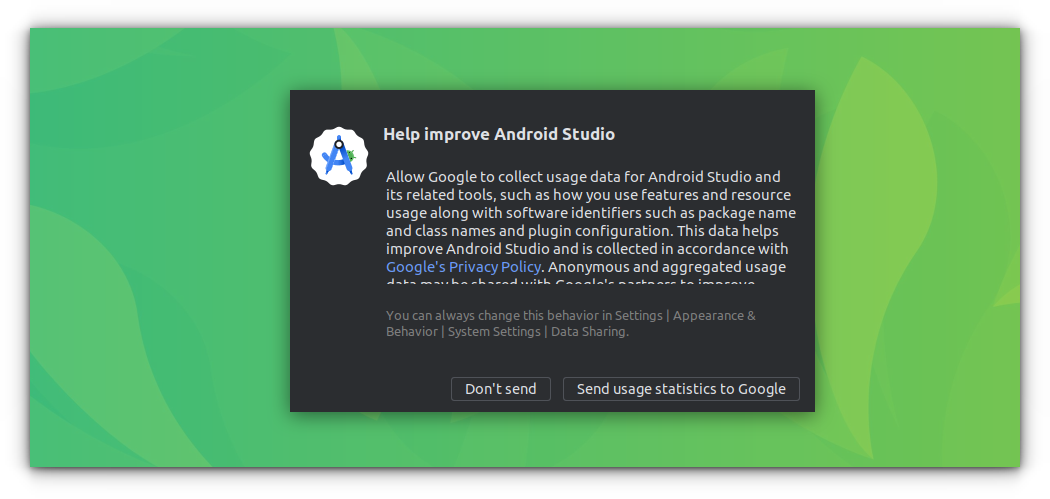
It will then ask for consent to share Usage statistics data with Google. Select accordingly.
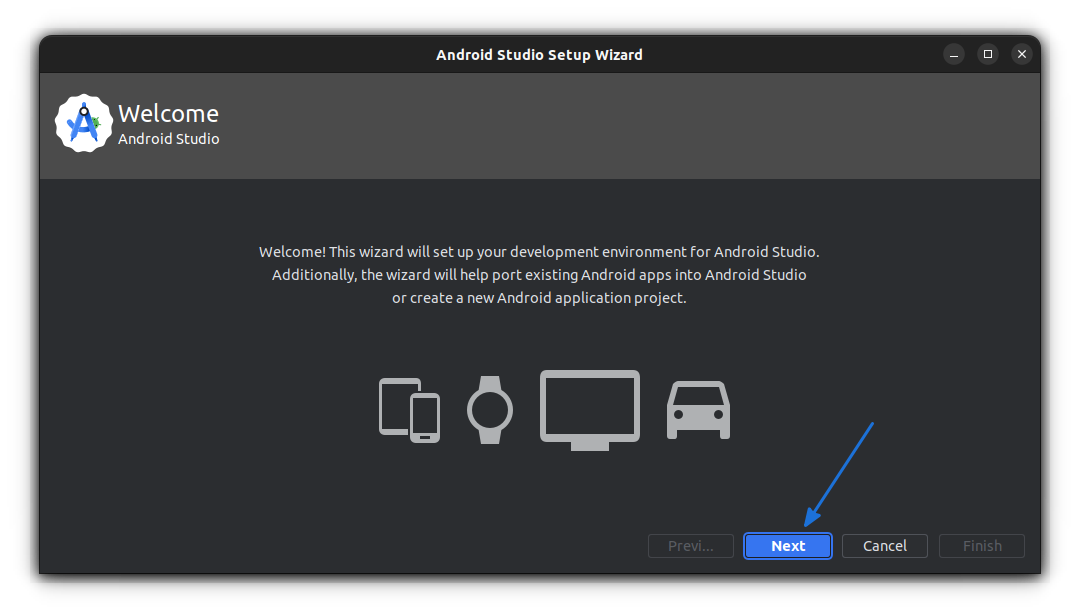
Now, on the welcome screen, click on Next.
Set the installation type as Standard and click Next.
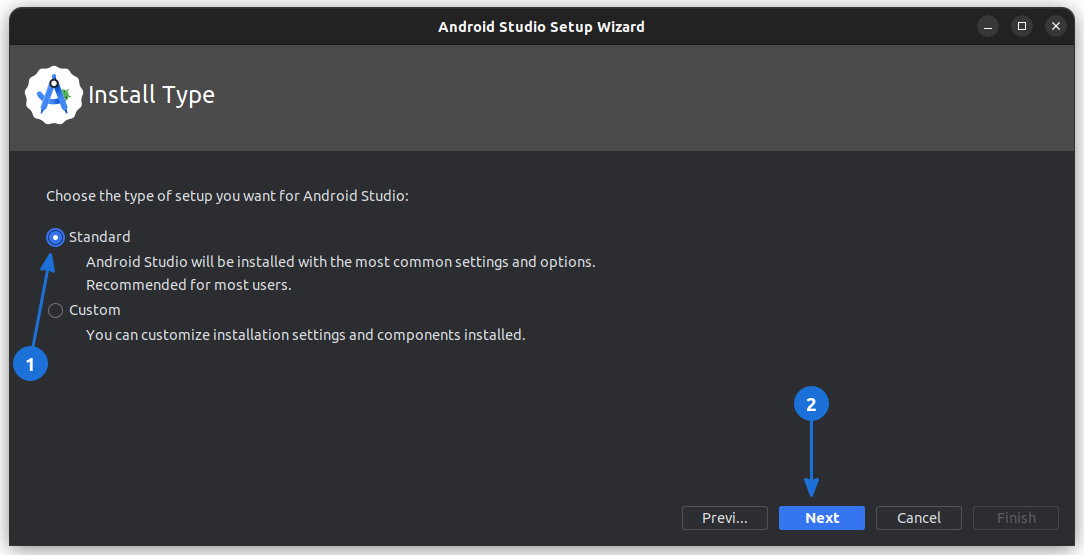
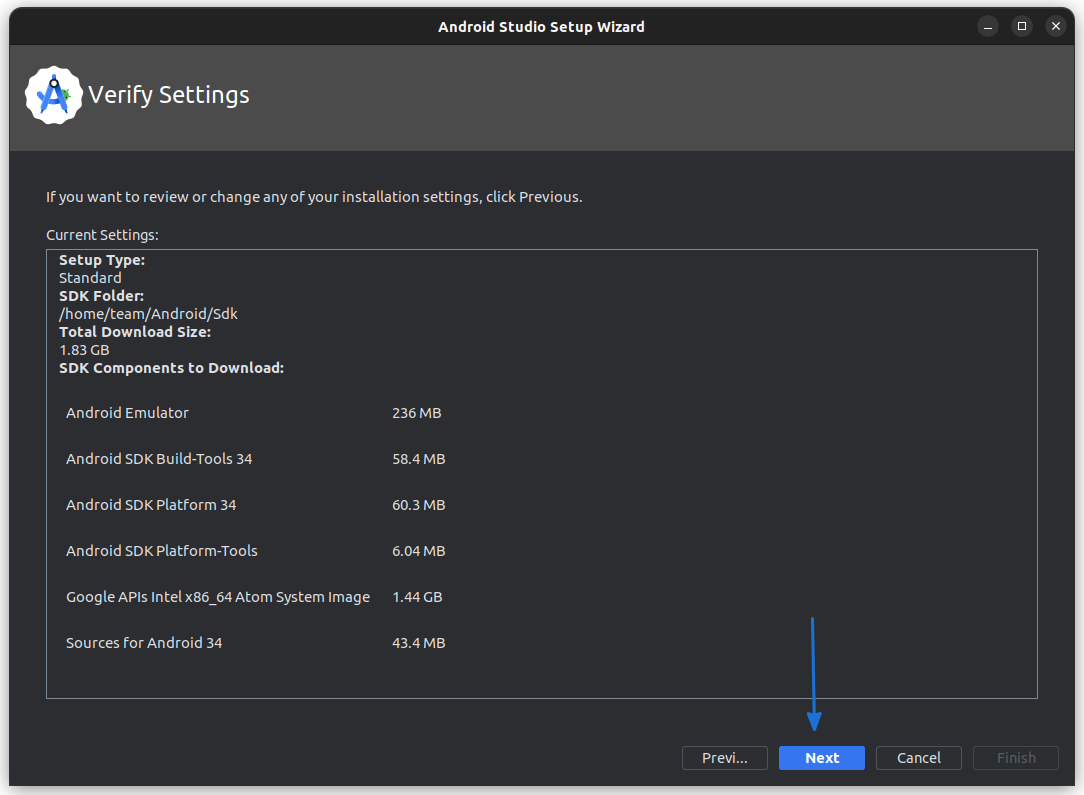
The setup wizard will now give you an overview of settings and the files to be downloaded, if you are ok with those, click on Next.
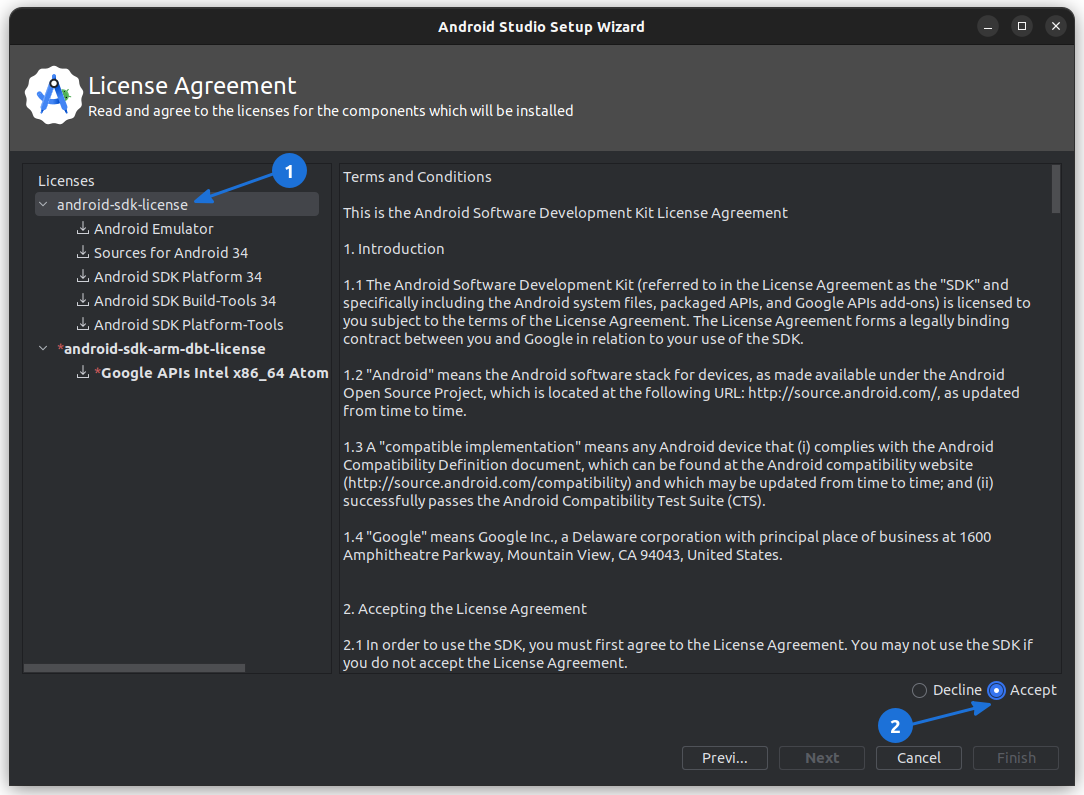
On the next screen, first you need to accept the Android SDK License.
Next, you need to select android-sdk-arm-dbt-license and accept it.
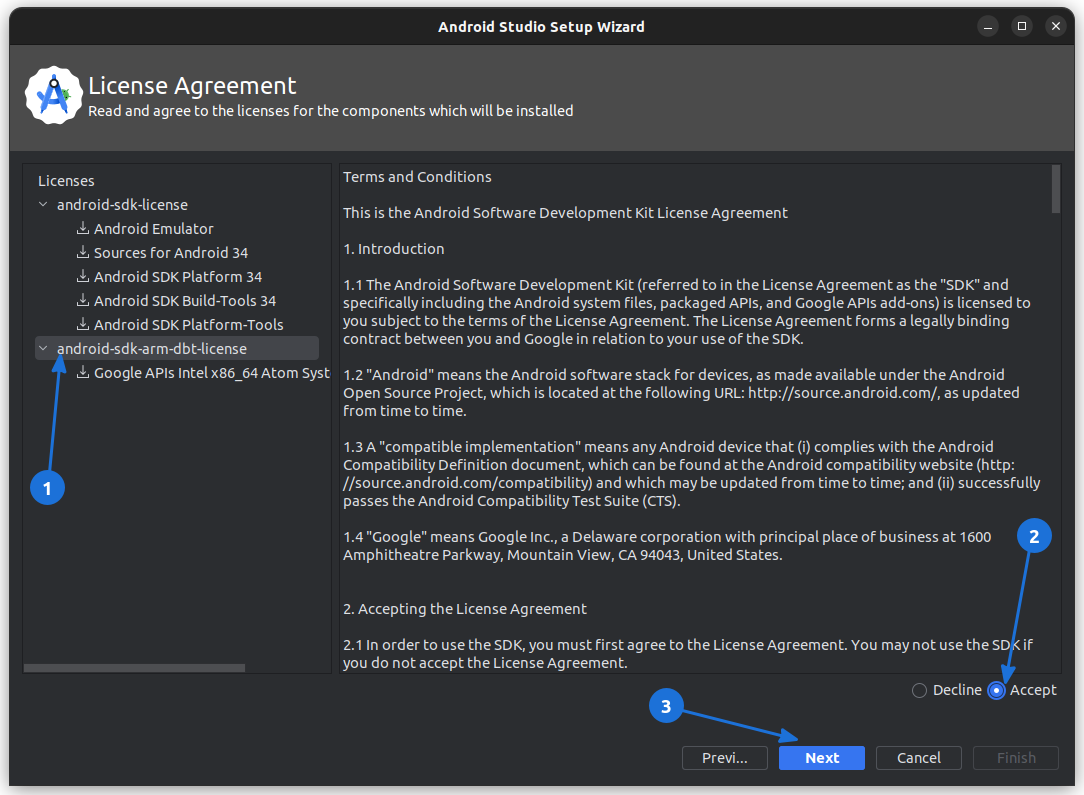
On the next screen, click on the Finish button.
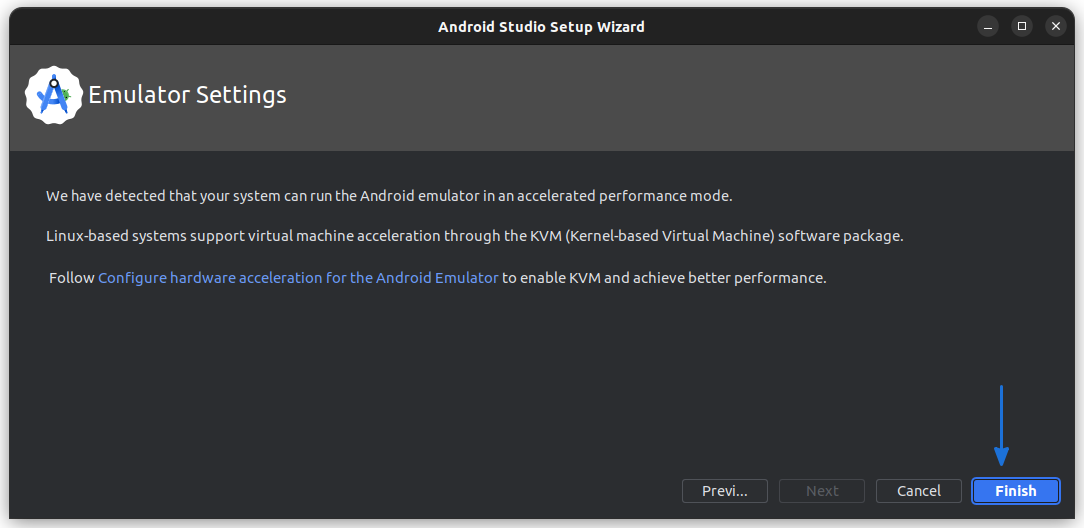
This will start downloading and extracting the required files. You should need a better internet connection and wait for some time for the operation to finish.
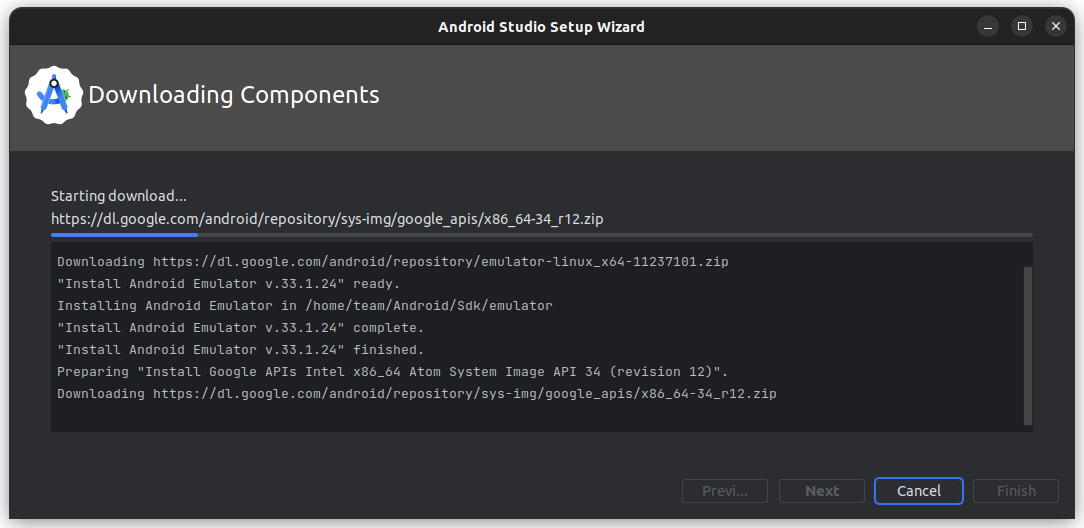
Click on the Finish button, when the processes are completed.
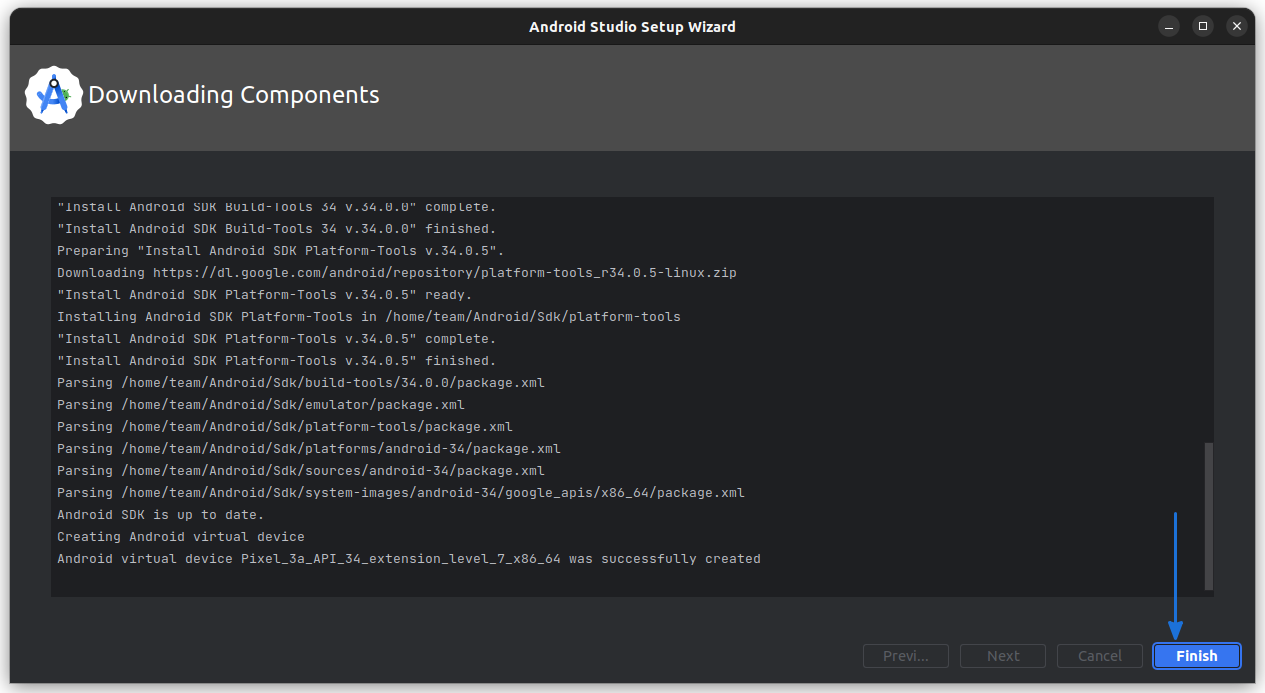
You will reach the welcome screen of Android studio.
Create a Desktop Entry
For easy access to Android Studio from everywhere, you should create a desktop entry for it. For this, first, click on the gear icon on the Android Studio welcome screen. From the dropdown menu, select “Create a Desktop Entry” item.
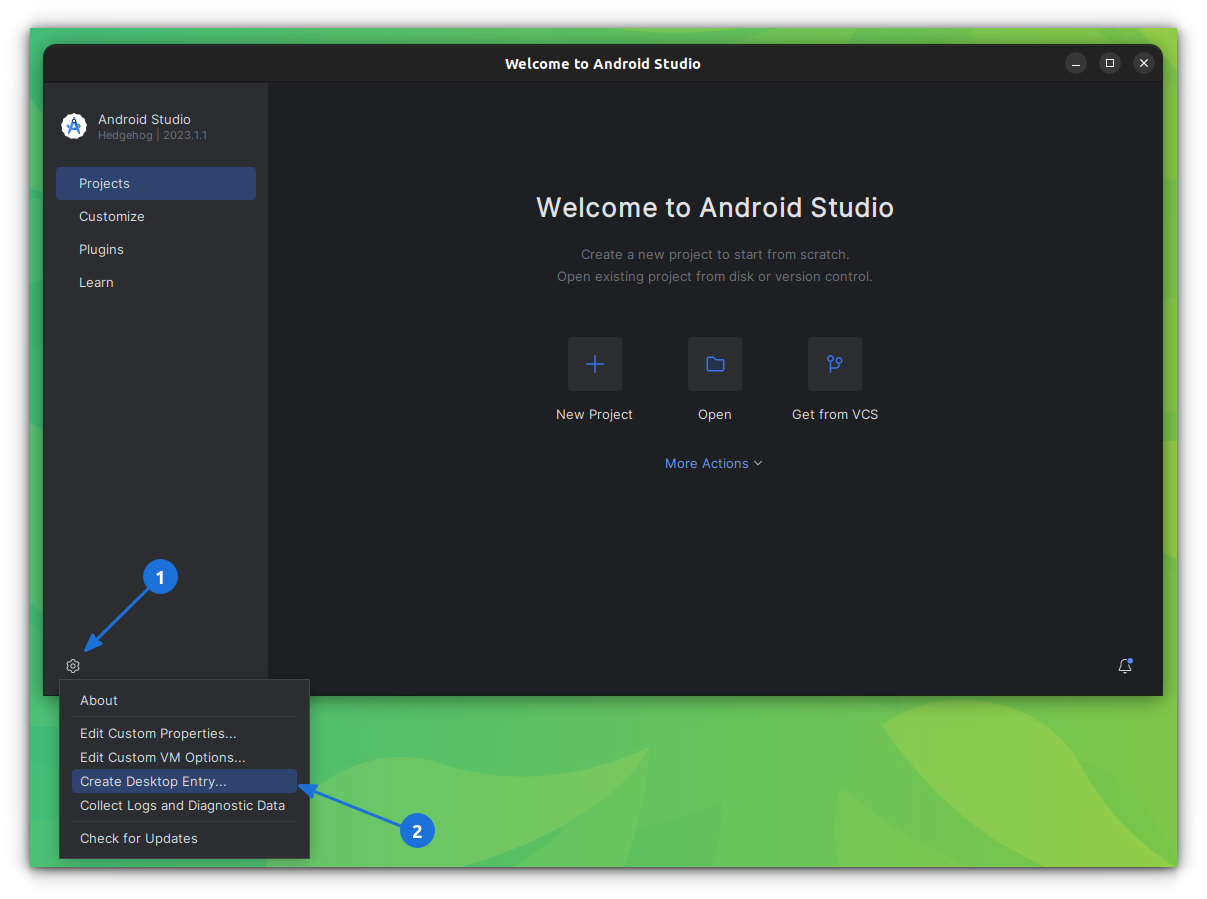
On the next page, you will be asked for whom, this desktop entry be created. If you want to create it for all users (Android Studio Files in /opt/ directory), you need to enter the password as well. Click OK.

You can now open Android studio from Ubuntu activities overview, or your system menu.

Updating Android Studio
If you have an update, it will notify you about the same. Or, to check for any update manually, click on Gear Icon → Check for Updates.
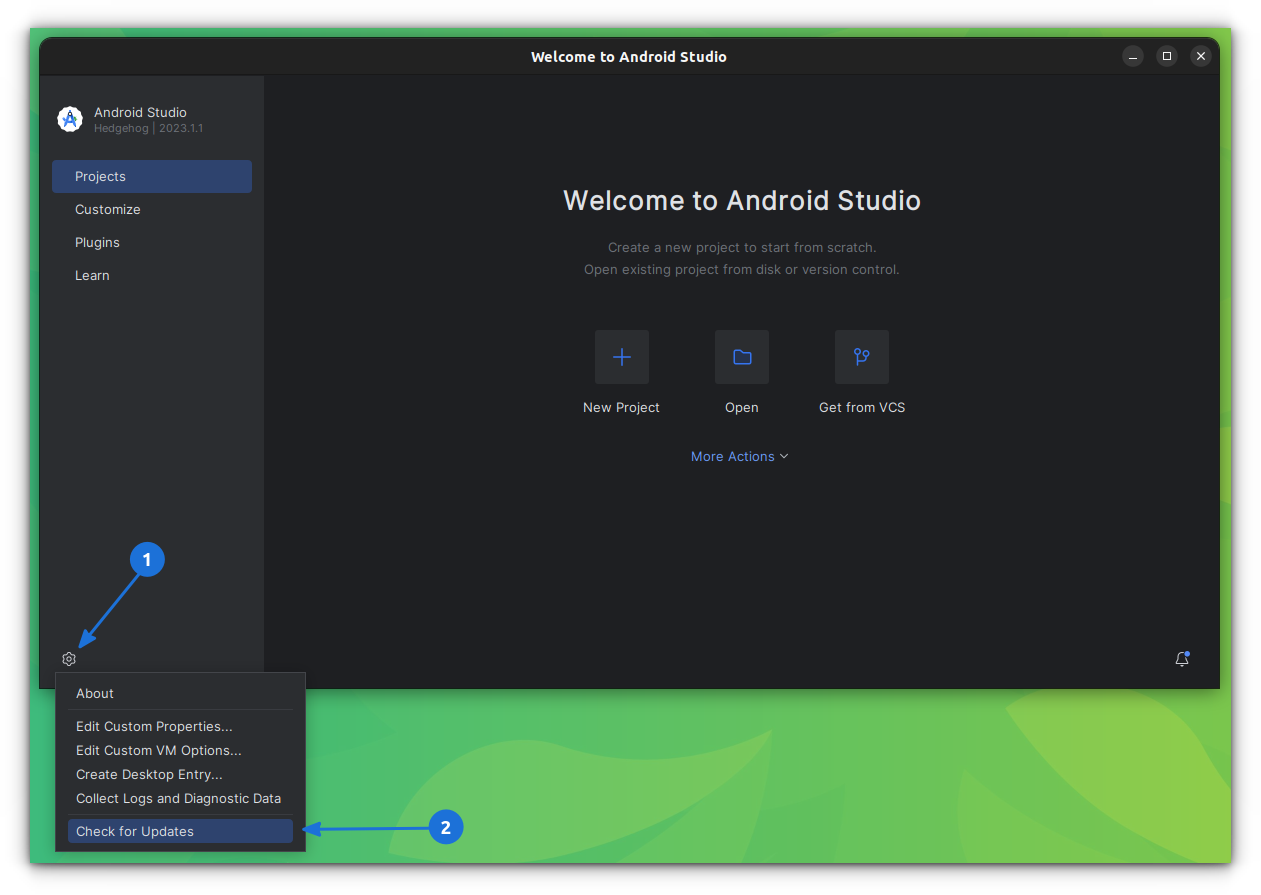
If there is no update, it will be notified, once you do this.

Removing Android Studio
To remove Android studio, first, you need to remove the desktop file.
sudo rm /usr/share/applications/jetbrains-studio.desktop
After this, remove the android-studio directory from /opt/.
sudo rm -rf /opt/android-studio/
Now, you can remove the residual directory from your Home.
rm -rf ~/AndroidWrapping Up
I hope this quick helps you to install Android Studio in Ubuntu and Linux Mint, and other Linux distributions. Before you run Android Studio, make sure to install Java in Ubuntu first. In similar posts, I advise you to read how to install and configure the Ubuntu SDK and how to install Microsoft Visual Studio easily in Ubuntu.
Any questions or suggestions are always welcomed. Ciao 😄
Here is a list of open-source Android apps that you can use.

Looking for some Android emulators? We have got you covered.
