
There are several ways to install Linux.
- You can clean everything from your system and install Linux.
- You can dual boot Linux with Windows and choose one of the operating systems at the boot time.
- You can even install Linux within Windows from Microsoft Store (though this only provides you with the command line version of Linux).
But if you want to use Linux without making any changes to your Windows system, you can go the virtual machine route.
Basically, you install and use Linux like any regular Windows application. When you just want to try Linux for limited use, virtual machines provide the most comfortable option.
In this tutorial, I’ll show you how to install Linux inside Windows using VirtualBox.
Installing Linux inside Windows using VirtualBox
VirtualBox is a free and open-source virtualization software from Oracle. It enables you to install other operating systems in virtual machines. It is recommended that your system should have at least 4 GB of RAM to get decent performance from the virtual operating system.
Requirements
- Good internet connection to download software and Linux ISO. (You can also use some other computer with an internet connection to download these files.)
- Windows system with at least 12-20 GB of free space.
- Windows system with 4 GB of RAM. (the more, the merrier)
- Make sure to enable virtualization in the BIOS (some system need it)
I am installing Ubuntu 22.04 in this tutorial, but the same steps apply to any other Linux distribution. If you prefer videos, you can watch the one below from our YouTube channel:
Step 1: Download and install VirtualBox
Go to the website of Oracle VirtualBox and get the latest stable version from here:
Installing VirtualBox on Windows is not rocket science. Just double-click on the downloaded .exe file and follow the instructions on the screen. It is like installing any regular software on Windows.
If you want to install it on Ubuntu, you can refer to our tutorial on installing VirtualBox.
Step 2: Download the Linux ISO
Next, you need to download the ISO file of the Linux distribution. You can get this image from the official website of the Linux distribution you are trying to use.
I am using Ubuntu in this example, and you can download ISO images for Ubuntu from the link below:
Step 3: Install Linux using VirtualBox
Considering you have VirtualBox installed and downloaded the ISO for a Linux distro. You are now set to install Linux in VirtualBox.
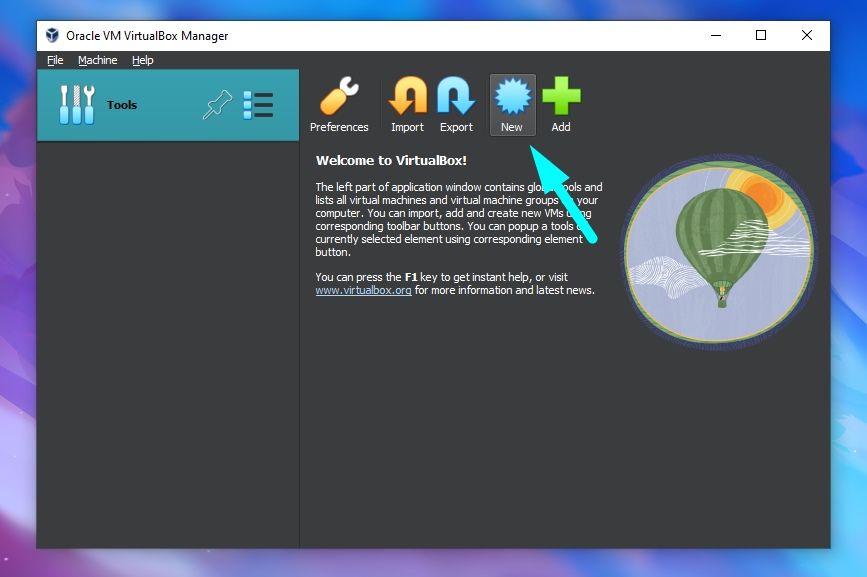
Start VirtualBox, and click on the New symbol to create a virtual machine.
It should let you write a name, and the select the ISO. The rest of the things should be automatically set.
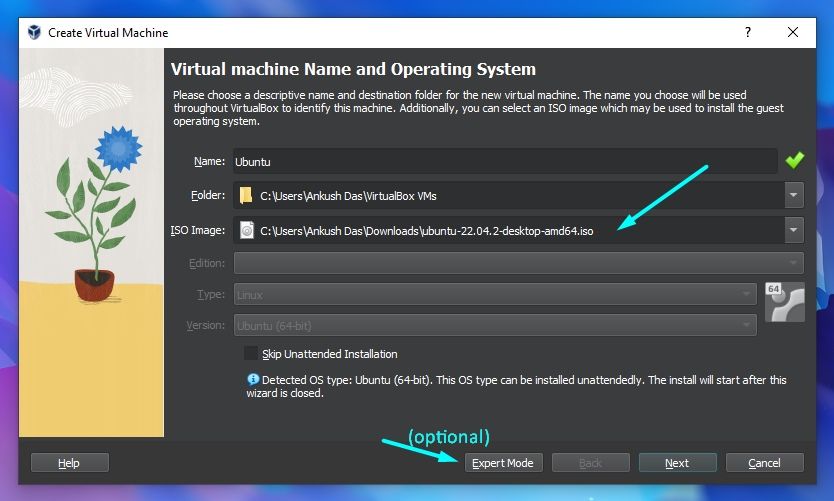
If not, you can manually select the type of the operating system as “Linux” and the version as per your preferences. Furthermore, if you want more control/options, you can choose to select the "Expert Mode".
However, for this tutorial we stick to the "Guided Mode", which should be the default.
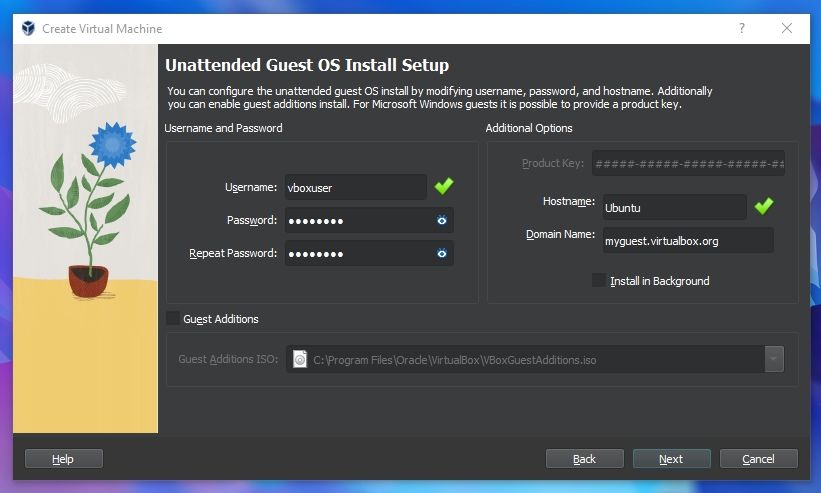
For Ubuntu, VirtualBox supports creating a username, password, and specifying the hostname. You can decide to customize it or go with the defaults.
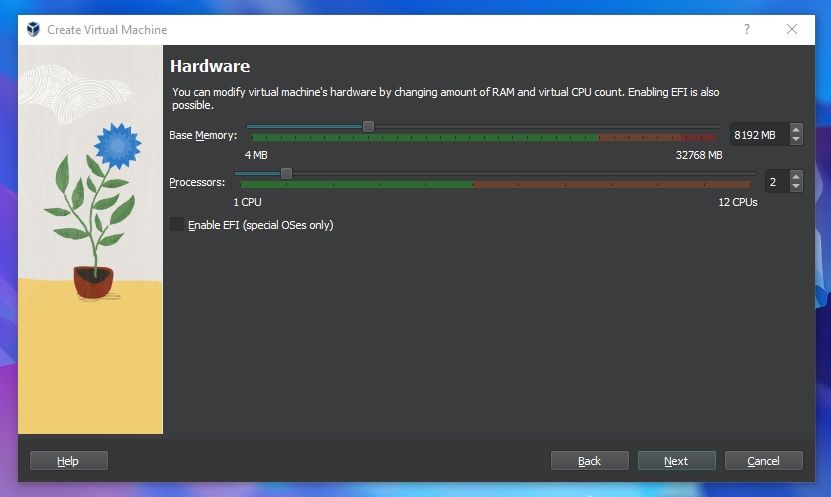
Next, you need to allocate memory and the CPU to help run the virtual machine.
It is recommended to allocate half of what your system offers. Suppose you have 16 Gigs of RAM, you can allocate 8 to the virtual machine. Unless the Linux distro is among the super lightweight Linux distros, it is safe to go with 6 GB or more.
Now the virtual disk. This serves as the hard disk of the virtual Linux system. It is where the VM will store its files.
Go with the defaults. If you have too much of less virtual hard disk space, the Linux distro might not install. The minimum recommendations are usually 15-20 GB for a desktop distribution.
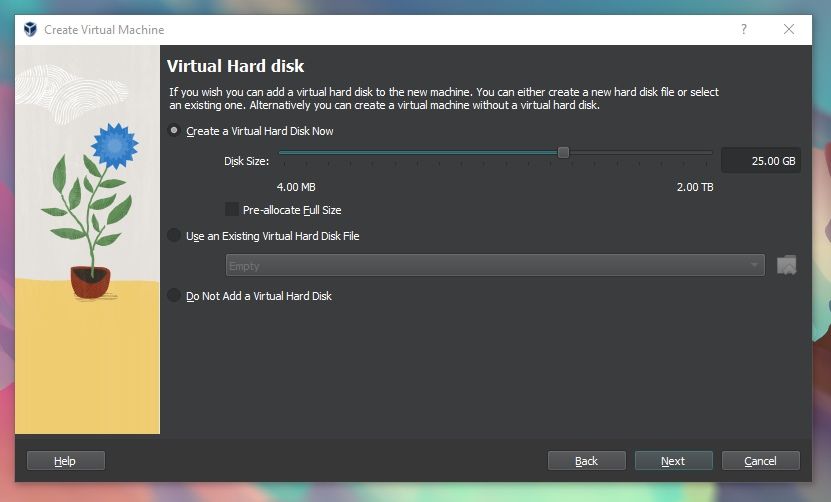
By default, the disk is “Dynamically allocated”, meaning, it will only take up space when the OS is installed and when files are stored in it.
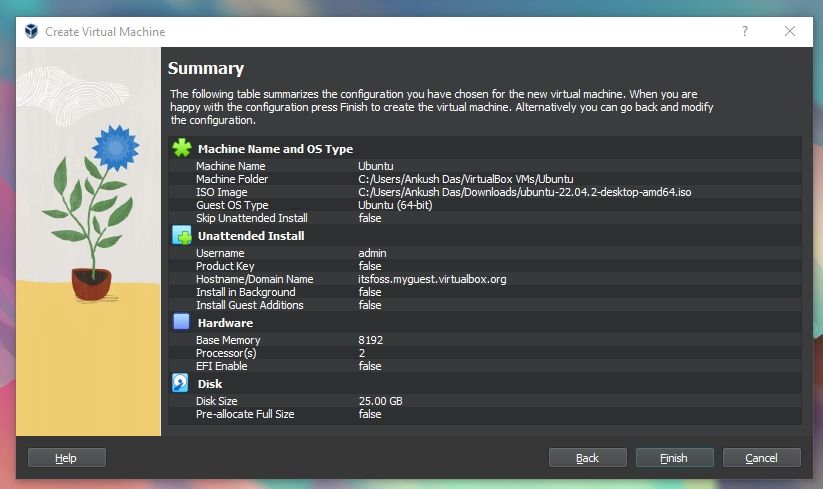
You will be now shown a summary of all your selections, and then it is time to launch and initiate installing the Linux OS as a virtual machine.
Once everything is in place, it’s time to boot that ISO and install Linux as a virtual operating system.
Suggested Read 📖

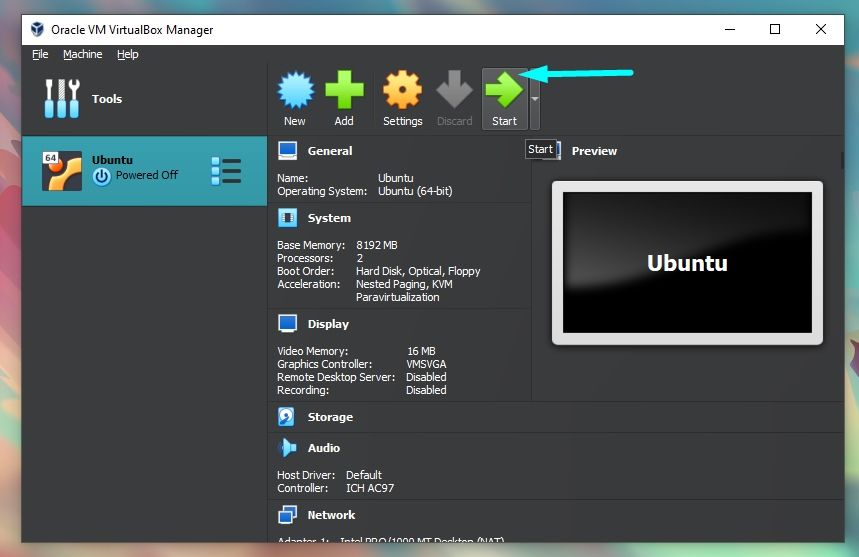
Soon, you will boot into the Linux operating system. You should be presented with the option to install it.
Things from here are Ubuntu-specific or distro-specific. Other Linux distributions may have slightly different looking steps, but it won’t be complicated at all.
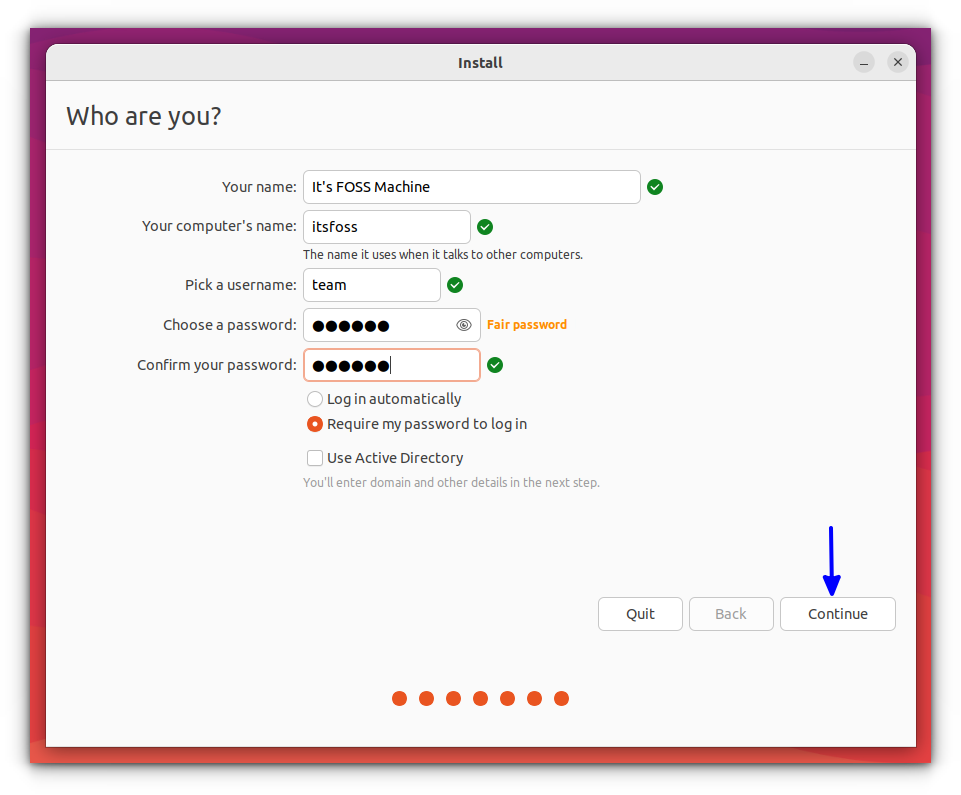
For Ubuntu, it will just ask you to confirm the username/hostname details that you already set in the previous steps, and you can hit "Continue" to start the installation right away.
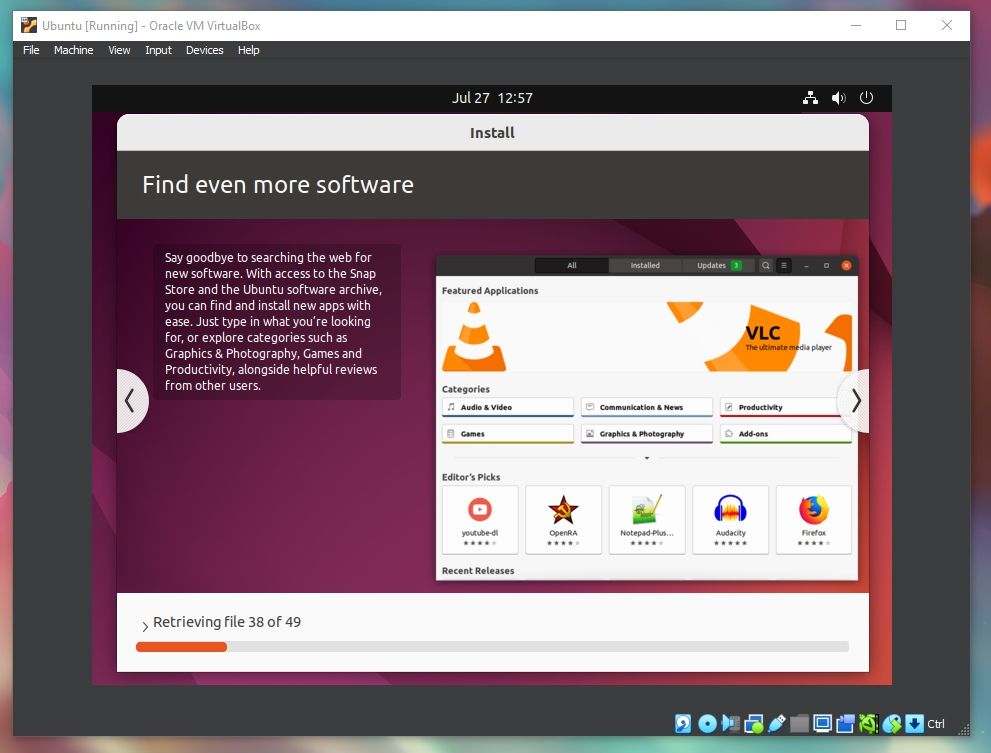
It will be a seamless installation experience, with no special configuration required by you.
Once installed, you can follow the usual first-time setup options on Ubuntu as per your preferences, such as enabling Ubuntu Pro subscription and privacy settings.
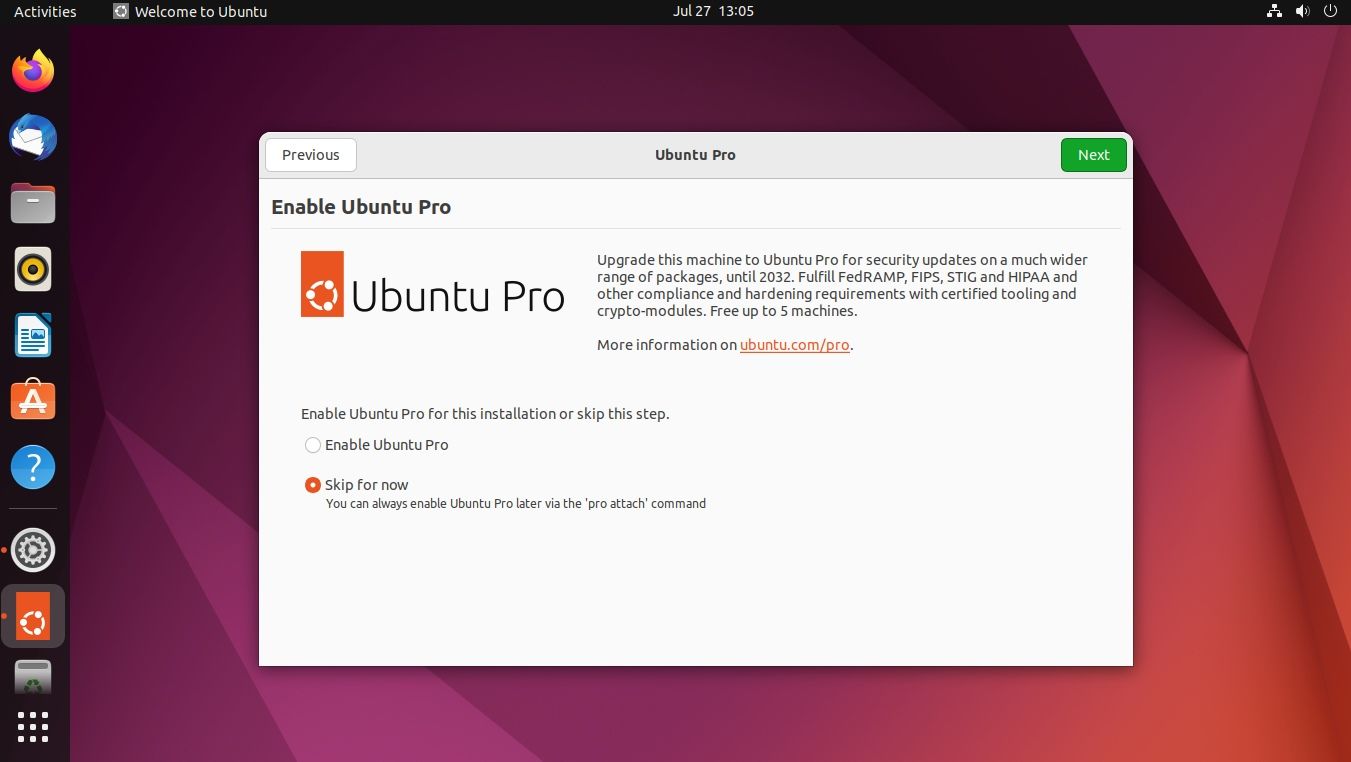
And, that is it. You are done!
I strongly recommend using VirtualBox Guest Additions on Ubuntu because it provides better compatibility, and you would be able to use copy-paste and drag-drop between Linux and Windows.

Troubleshooting: AMD-V is disabled in the BIOS
If you face this error or VMX_DISABLED (on Intel systems) while using the virtual machine:
Not in a hypervisor partition (HVP=0) (VERR_NEM_NOT_AVAILABLE).
AMD-V is disabled in the BIOS (or by the host OS) (VERR_SVM_DISABLED).
Result Code:
E_FAIL (0x80004005)
Component:
ConsoleWrap
Interface:
IConsole {872da645-4a9b-1727-bee2-5585105b9eed}
This means that virtualization is blocked on your system. You’ll have to activate it in your BIOS settings first.
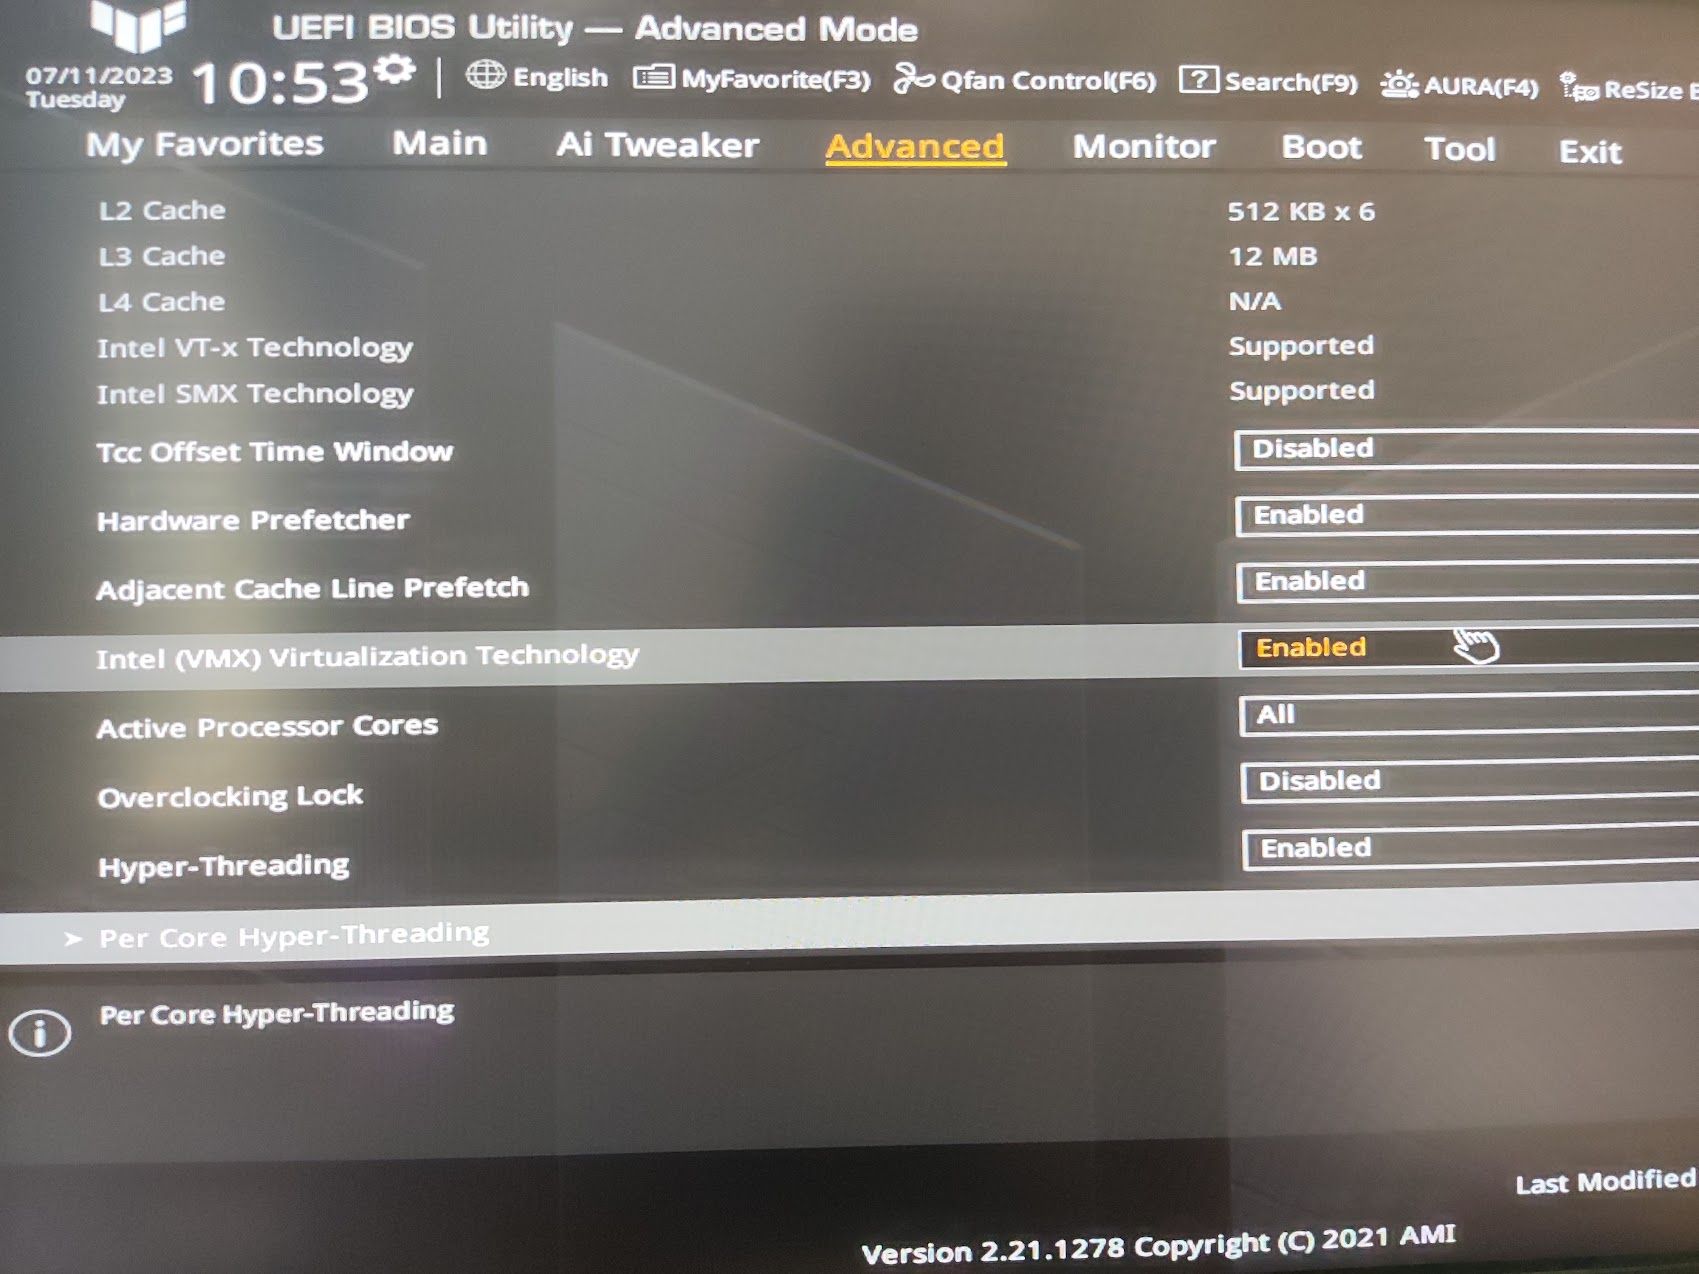
Reboot your system and as soon as it powers up, press F1, F2, F10, or F12 to access BIOS settings. You have to look for the virtualization option, mostly present under the Advanced settings.
Any questions?
That’s all you need to do to install Linux in VirtualBox on Windows.
If you have any doubts, or if you encounter any issues, please feel free to ask your questions in the comment box below.


