
Simply creating well-formatted notes isn’t enough to manage the information you collect in daily life—accessibility is key.
If you can't easily retrieve that information and its context, the whole point of "knowledge management" falls apart.
From my experience using it daily for several months, I’d say Logseq does a better job of interlinking notes than any other app I’ve tried.
So, without further ado, let’s dive in.
The concept of page, links, and tags
If you’ve used Logseq before, you’ve likely noticed one key thing: everything is a block. Your data is structured as intentional, individual blocks. When you type a sentence and hit Enter, instead of just creating a new line, Logseq starts a new bullet point.
This design brings both clarity and complexity.
In Logseq, pages are made up of bullet-formatted text. Each page acts like a link—and when you search for a page that doesn’t exist, Logseq simply creates it for you.
Here’s the core idea: pages and tags function in a very similar way. You can think of a tag as a special kind of page that collects links to all content marked with that tag. For a deeper dive into this concept, I recommend checking out this forum post.
Logseq also supports block references, which let you link directly to any specific block—meaning you can reference a single sentence from one note in another.
Creating a new page in Logseq
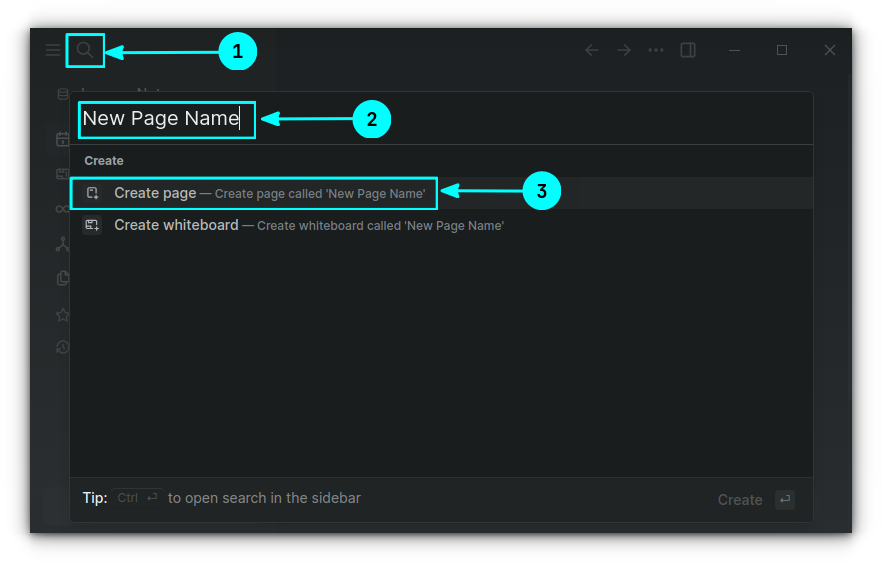
Click on the top-left search icon. This will bring a search overlay. Here, enter the name of the page you want to create.
If no such page is present, you will get an option to create a new page.
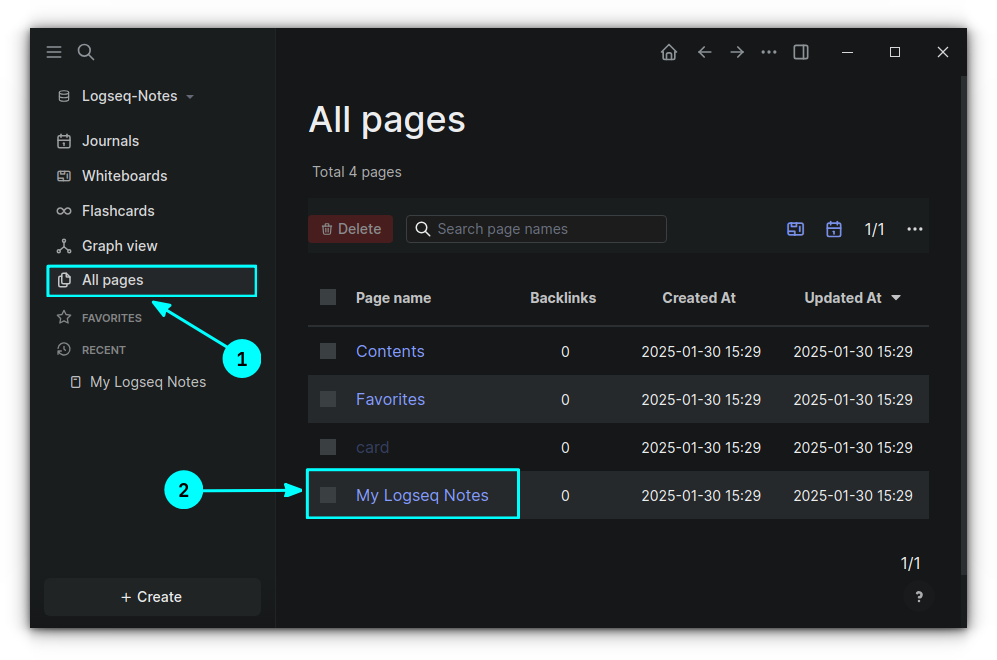
For example, I created a page called "My Logseq Notes" and you can see this newly created page in 'All pages' tab on Logseq sidebar.
Logseq stores all the created page in the pages directory inside the Logseq folder you have chosen on your system.
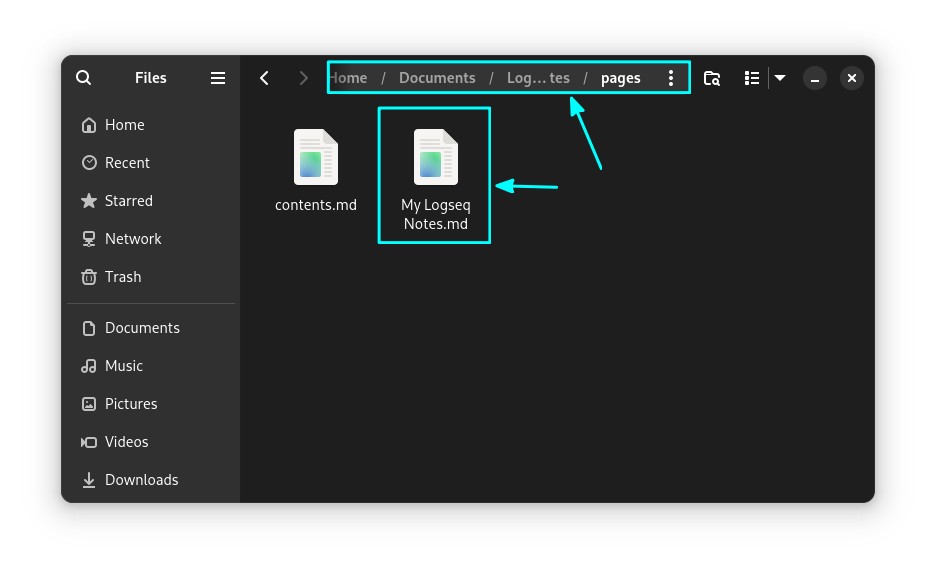
pages directory in File ManagerThere won't be any nested directories to store sub-pages. All those things will be done using links and tags. In fact, there is no point to look into the Logseq directory manually. Use the app interface, where the data will appear organized.
⌨️ Use keyboard shortcut for creating pages
Powerful tools like Logseq are better used with keyboard. You can create pages/links/references using only keyboard, without touching the mouse.
The common syntax to create a page or link in Logseq is:
#One-word-page-nameYou can press the # symbol and enter a one word name. If there are no pages with the name exists, a new page is created. Else, link to the mentioned page is added.
If you need to create a page with multiple words, use:
#[[Page with multiple words separated with space]]Place the name of the note within two [[]] symbol.
Create pages with single word name or multi-word names.
Using Tags
In the example above, I have created two pages, one without spaces in the name, while the other has spaces.
Both of them can be considered as tags.
Confused? The further interlinking of these pages actually defines if it's a page or a tag.
If you are using it as a 'special page' to accumulate similar contents, then it can be considered as a tag. If you are filling paragraphs of text inside it, then it will be a regular page.
Basically, a tag-page is also a page but it has the links to all the pages marked with the said tag.
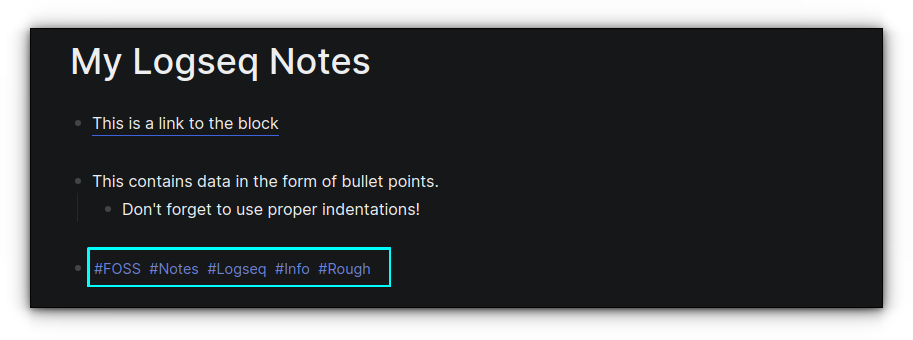
To add a tag to a particular note, you can type #<tag-name> anywhere in the note. For convenience and better organization, you can add at the end of the note.
Linking to a page
Creating a new page and adding a link to an existing page is the same process in Logseq. You have seen it above.
If you press the [[]] and type a name, if that name already exists, a link to that page is created. Else, a new page is created.
In the short video below, you can see the process of linking a note in another note.
Adding link to a page in Logseq in another note.
Desktop Linux is mostly neglected by the industry but loved by the community. For the past 12 years, It's FOSS has been helping people use Linux on their personal computers. And we are now facing the existential threat from AI models stealing our content.
If you like what we do and would love to support our work, please become It's FOSS Plus member. It costs $24 a year (less than the cost of a burger meal each month) and you get an ad-free reading experience with the satisfaction of helping the desktop Linux community.
Referencing a block
The main flexibility of Logseq lies in the linking of individual blocks. In each note, you have a parent node, then child nodes and grand-child nodes. These are distinguished by the indentation it has.
So, in the case of block referencing, you should take utmost care in properly adding indent to the note blocks.
Now, type ((. A search box will appear above the cursor. Start typing something, and it will highlight the matching block anywhere in Logseq.
Referencing a block inside a note. The block we are adding is part of another note.
Similarly, you can right-click on a node and select "Copy block ref" to copy the reference code for that block.
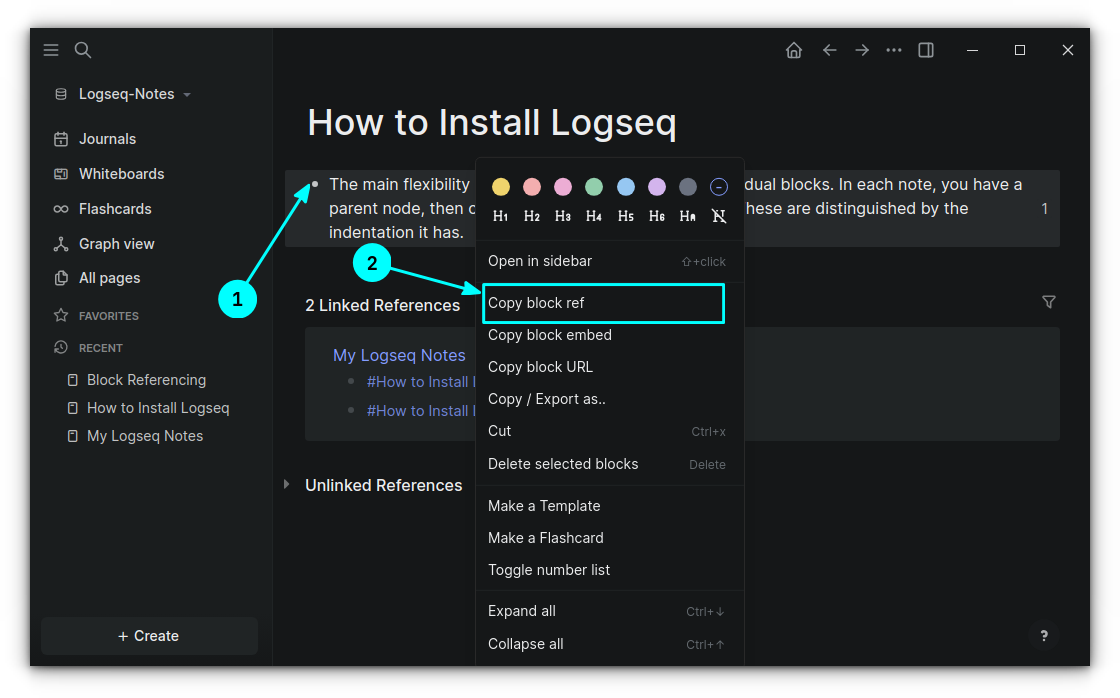
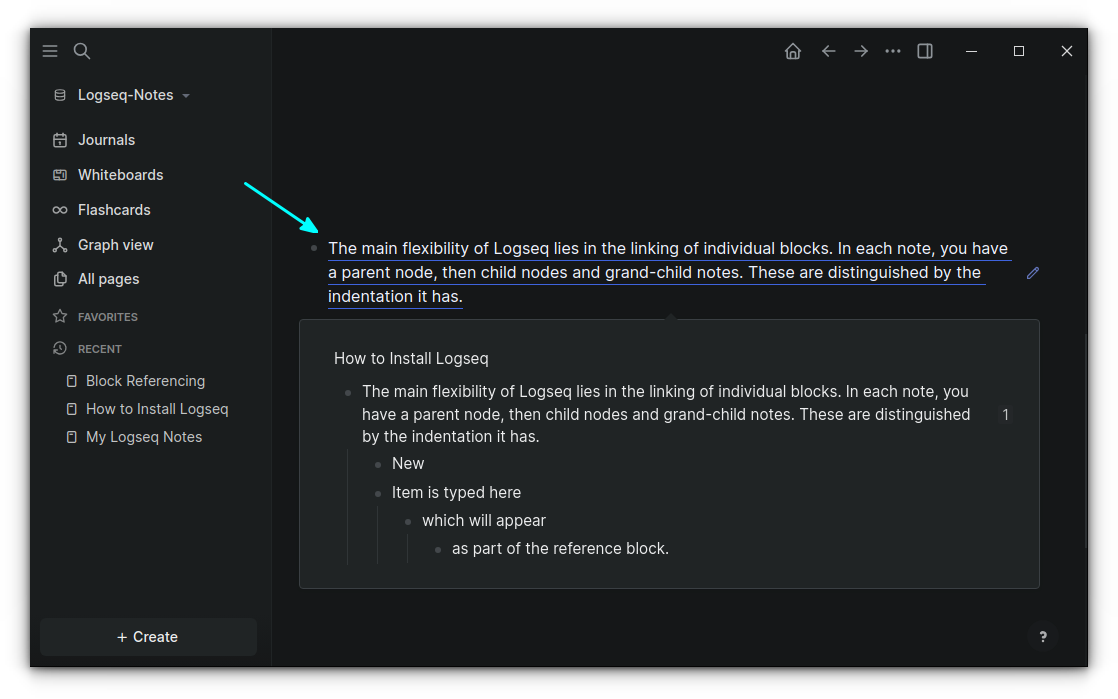
Now, if you paste this on other note, the main node content is pasted and the rest of that block (intended contents) will be visible on hover.
🖇️ Block referencing with Markdown
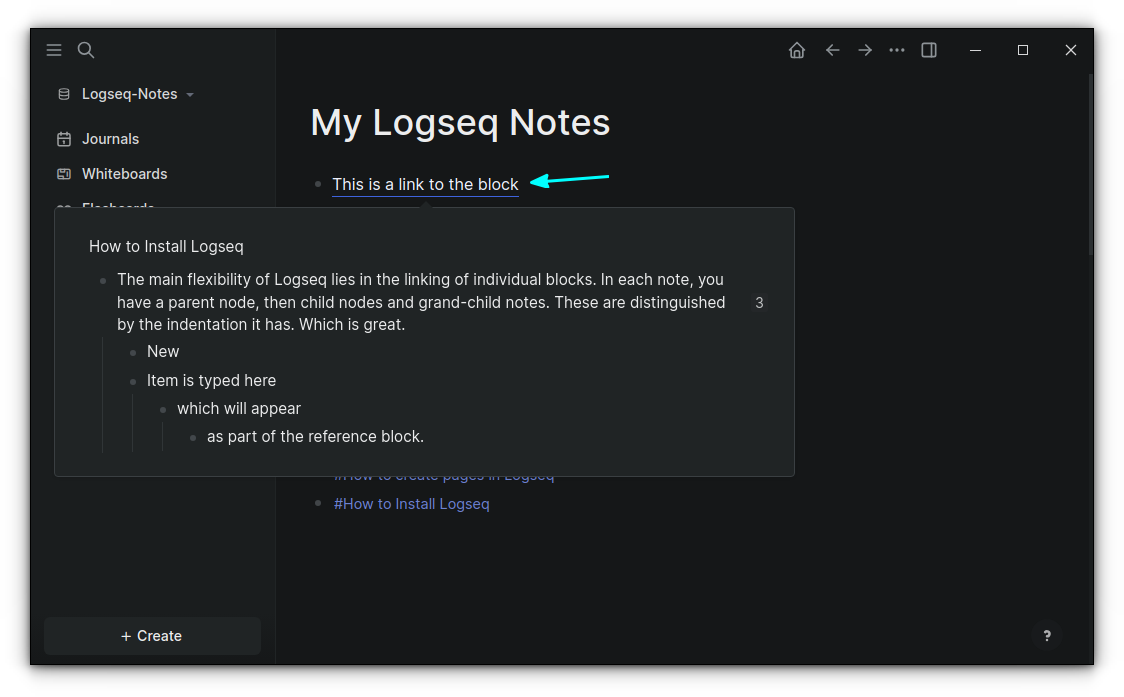
Once you have the block reference code, you can use it as a URL to link to a particular word, instead of pasting raw in a line. To do that, use the Markdown link syntax:
[This is a link to the block](reference code of the block)For example:
[This is a link to the block](((679b6c26-2ce9-48f2-be6a-491935b314a6)))So, when you hover over the text, the referenced content is previewed.
Now that you have the basic building blocks, you can start organizing your notes into a proper knowledge base.
In the next tutorial of this series, I'll discuss how you can use plugins and themes to customize Logseq.


