GNOME Boxes is a VirtualBox and VM Ware like virtualization tool focusing on desktop Linux. It provides a simple GUI to create and manage virtual operating systems.
Virtual machines are a good way to test another operating system or distribution (in Linux context).
One of the pain points you’ll experience with VMs is the trouble in copying-pasting and file sharing between the guest and host systems.
Imagine you saved a file in the virtual machines, but now you need it in your actual host system outside the VM. The ability to share the files between the two systems makes the VM experience quite smooth.
Let me show you how to do file sharing with GNOME Boxes. It consists of three steps:
- Installing the required package on the guest OS (VM) to enable file sharing
- Knowing how to transfer files from the host OS to the guest OS (drag and drop)
- Knowing how to transfer files from the guest OS to the host OS (through a shared folder)
Step 1: Install the required package on guest OS
Your guest OS (Linux distribution in the VM) needs a SPICE package in order to share files with the host OS (the main operating system).
For Linux guest OS
On Debian, Ubuntu and Fedora-based distributions, this package is named spice-webdavd. You can use your distribution’s package manager to install it inside the guest OS (running in the virtual machine).
For Ubuntu and Debian-based systems, use this command:
sudo apt install spice-webdavd spice-client-gtk spice-vdagentspice-vdagent package is used to get features like automatic screen resolution, copy-paste between guest and host, etc.For Fedora-based distributions, use this command:
sudo dnf install spice-webdavd spice-client-gtk spice-vdagentFor Arch Linux based distributions, use the command:
sudo pacman -Syu --needed spice spice-gtk spice-protocol spice-vdagent gvfs-dnssdFor Windows guest OS
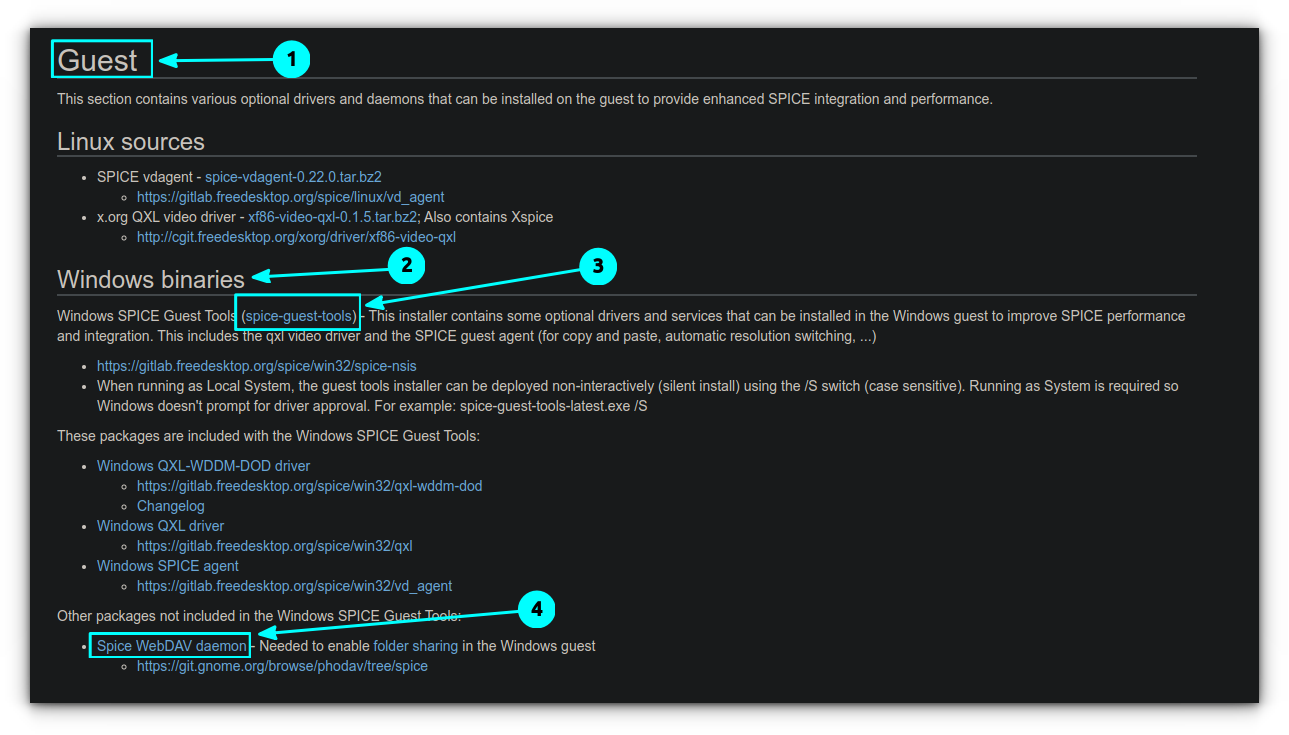
If you are using Windows as the guest, you need to download and install the SPICE packages. Head on to the official SPICE download page:
Go to the Guest section and under Windows binaries, download spice-guest-tools and the latest Spice WebDAV daemon.
Install those two packages. Restart the guest OS.
Step 2: Transfer files from the host OS to the guest OS
This is the simpler of the two. You just have to drag the desired file to the guest OS running in the VM.
You’ll see that when you are dragging the file to the VM, it starts showing a ‘Ready to Receive File’ option.
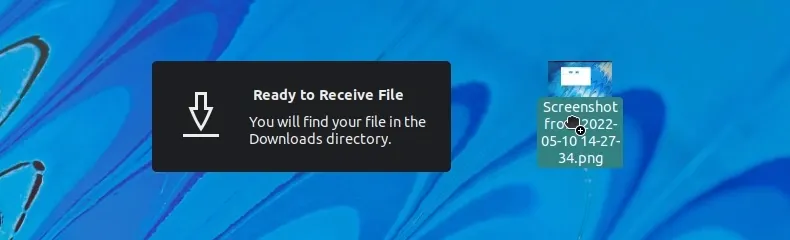
The transferred files are saved in the Downloads directory.
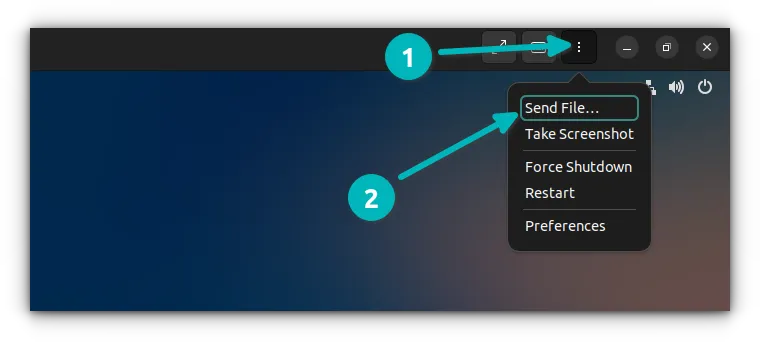
Alternatively, you can also send files from the GNOME Boxes menu. Just hit the hamburger menu and click on the Send File option.
Step 3: Transfer files from the guest OS to the host OS
This one is not as straightforward as dragging and dropping.
Here, you use the SPICE protocol to mount a folder of the host OS. You drop the files here, and it is transferred to that folder on the host.
The package you installed earlier was required for this kind of operation.
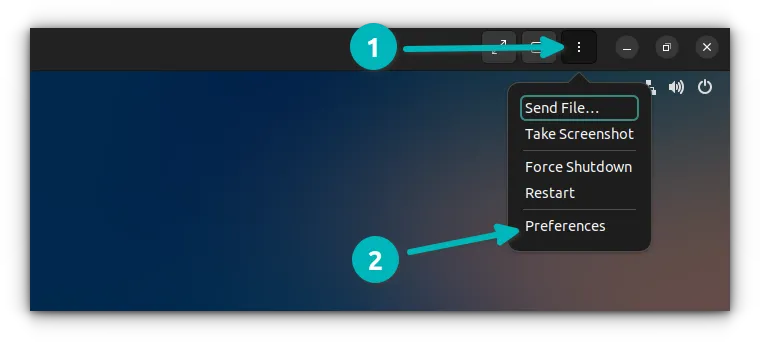
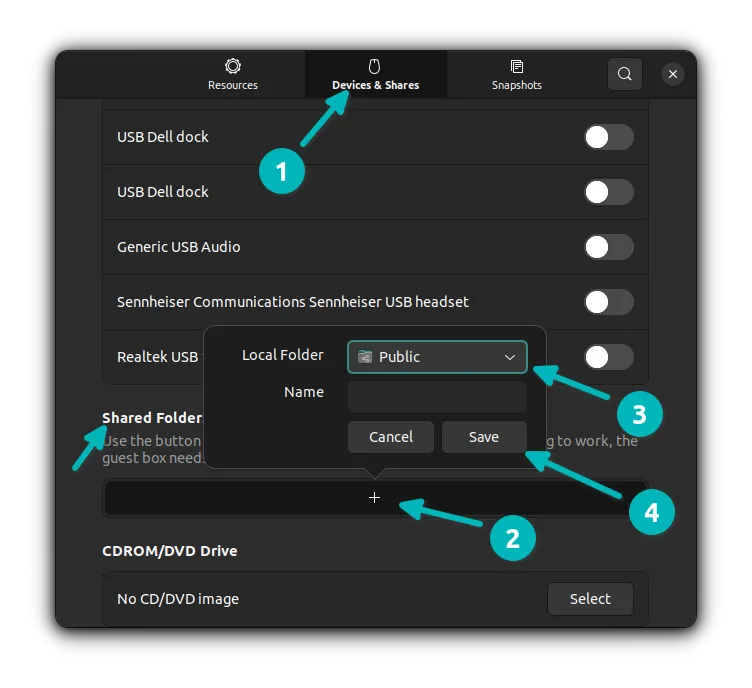
Click on the hamburger menu and select the Preferences option.
Here, go to the Devices & Shares tab. Look under the Shared Folder section. You should see a + button. Click on it, and it will give the default location of the Public folder on your host operating system. You can change it to any folder of your liking.
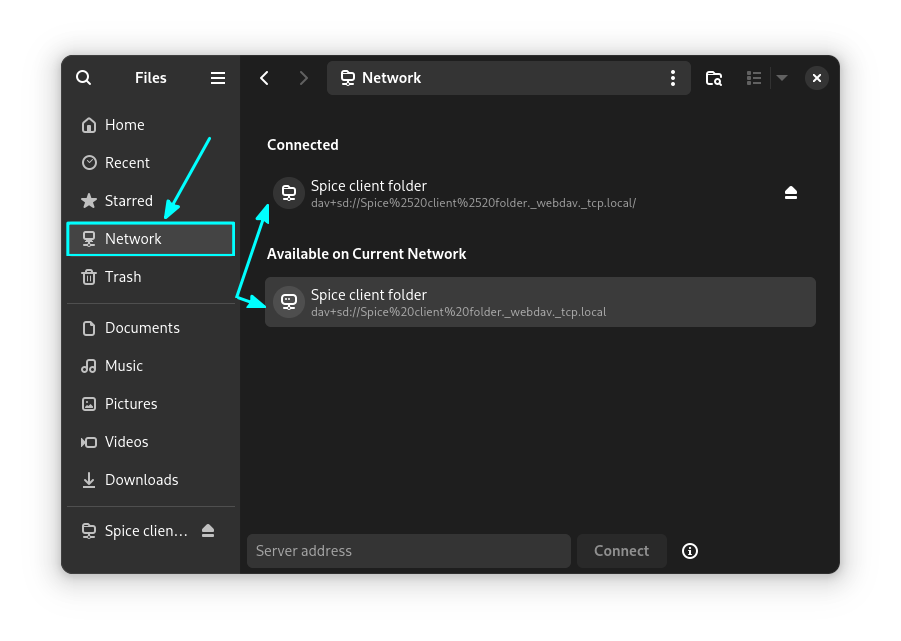
With that set, open the File Explorer in the guest OS. If you are using GNOME 47 or higher, click on the Network view. You can double-click on the spice client folder to mount it.
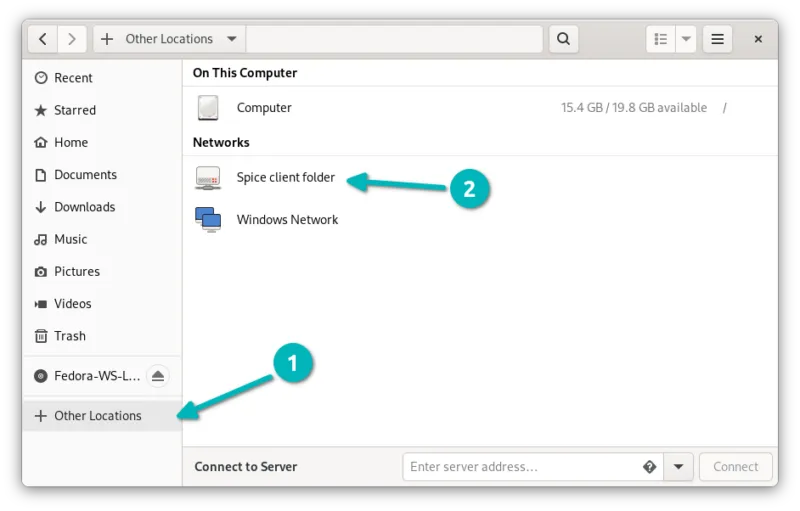
For older GNOME releases, you can go to the Other Locations → Networks → Spice Client folder.
This will mount the Spice client folder. Enter this mounted folder, and you should see the folder you had added via the Preference menu here. In the screenshot below, I have two shared folders (because I added another one later on).
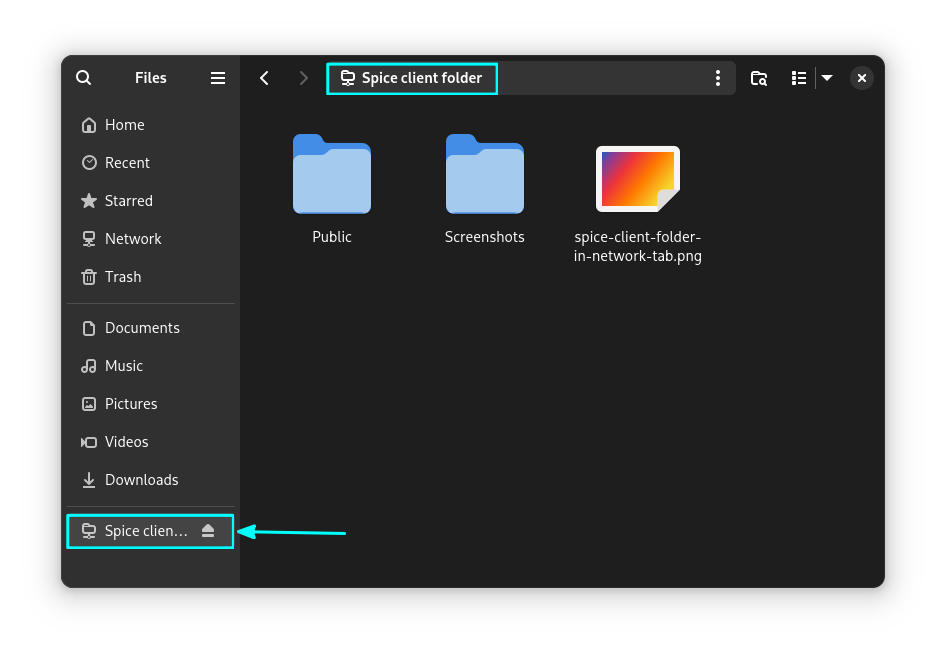
In the shared folders, you can create new folders or copy-paste the files. They will be immediately available in the host OS.
I shared screenshots taken in the guest OS and put them in the mounted Spice client folder. It immediately appeared in the public folder of the host OS.
Of course, it’s a two-way sharing. If you put something in the shared folder on the host OS, it will be accessible in the mounted folder in the guest OS.
Note that you have added the host OS’s folder on GNOME Boxes level. This means that if you have multiple VMs, all of them should be able to mount that folder.
To keep things organized, you may add multiple shared folders and name them in a way that you can recognize which VM uses them.
🔧 Troubleshooting: Connection Refused Error
GNOME Boxes file sharing is a great feature, but there will be hiccups at times. Here is a common issue seen with GNOME Boxes file sharing.
On systems like Ubuntu, when you add a shared folder, you will get errors like connection refused, invalid argument, etc. This is the case even if you followed the above procedure carefully.
In this case, you can directly use the server address. On Nautilus file manager, press CTRL+L. This will highlight the address panel. There type:
dav://localhost:9843This will open the shared folder in the file manager. You can move inside the folder and add a bookmark to the places section. Thus, access it in the future without typing the server address again and again.
Access the shared folder by providing the address in the address bar.
This same method can be used for KDE Plasma Dolphin file manager, if you don't see the Shared folder under the Network tab.
Did it work for you?
GNOME Boxes is a pretty good tool for trying various Linux distributions as virtual machines. You can also share the clipboard between the guest and host systems with the method described here. This means that if you copied some text in the host OS, you could paste it into the guest OS and vice versa.
This is pretty much what you need to know and do about sharing files between guest and host OS with GNOME Boxes.
Do let me know if you managed to make it work or if you still face issues. The comment section is all yours.